Category Archives: C#

Using Moq for testing

Install the nuget Moq package. Below is a simple example to create a mock for a database implementation (which is also a mock :-)).

namespace ConsoleApp1
{
    using Moq;
    using System;
    using System.Collections.Generic;

    public interface IDAL
    {
        List<string> RetrieveBooks();
    }

    public class DAL : IDAL
    {
        public List<string> RetrieveBooks()
        {
            return new List<string> { "a", "b", "c" };
        }
    }

    public class BookManager
    {
        private IDAL _dal;

        public BookManager(IDAL dal)
        {
            _dal = dal;
        }

        public List<string> GetBooks()
        {
            return this._dal.RetrieveBooks();
        }
    }

    class Program
    {
        static void Main(string[] args)
        {
            /*
             * Bookmanager with database implementation
             */
            Console.WriteLine("Database implementation");
            BookManager bmDB = new BookManager(new DAL());
            bmDB.GetBooks().ForEach(i => Console.WriteLine(i));

            /*
             * Bookmanager with a mock database
             */
            Console.WriteLine("Database mock implementation");
            var dal_mock = new Mock<IDAL>();
            dal_mock.Setup(i => 
               i.RetrieveBooks()).Returns(new List<string> { "d" });
            BookManager bmMOQ = new BookManager(dal_mock.Object);
            bmMOQ.GetBooks().ForEach(i => Console.WriteLine(i));
        }
    }
}

Share

Test a WCF service with SOAPUI

With help of SOAP UI you can easily test your webservices. In this pos tI’m going to test a WCF web service (yes MS WCF; not my favourite company and technology but anyway….)

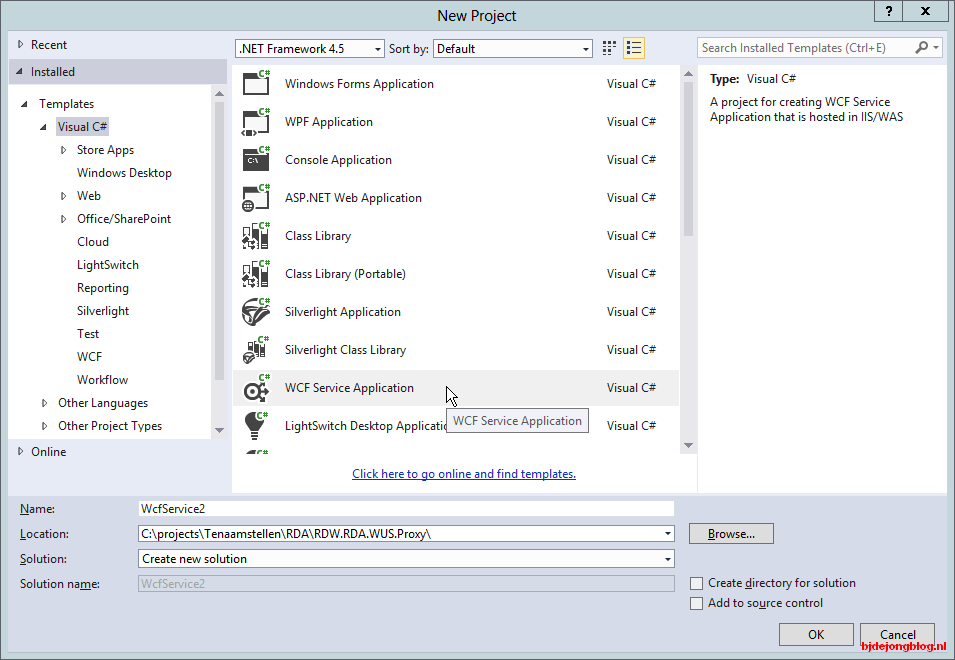
First create your webservice. Within Visual Studio goto File -> New Project . Choose Visual C# and select WCF Service Application

Create new project

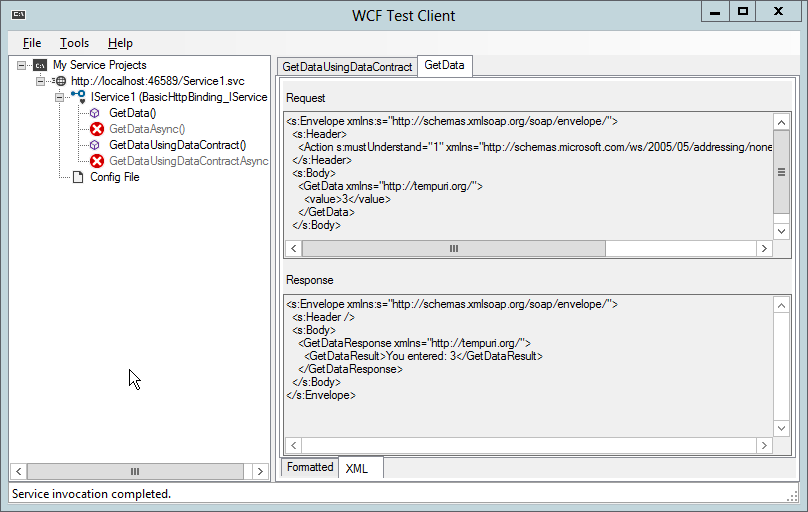
Now start your project by pressing F5; the service, together with the WCF Test Client, will start and there are two methods available on this service:

GetData and GetDataUsingDataContract

The WCF Test client

Play around with the WCF Test Client to get the idea of how this works. Next we will install SOAP UI. Download your copy here. Install SOAP UI using the default settings.

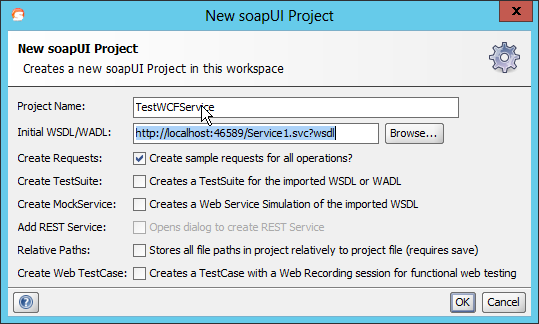
After installation start SOAP UI and create a new project. Goto File -> New soapui Project . Fill out the dialog as shown below (don’t forget to add the ?wsdl ):

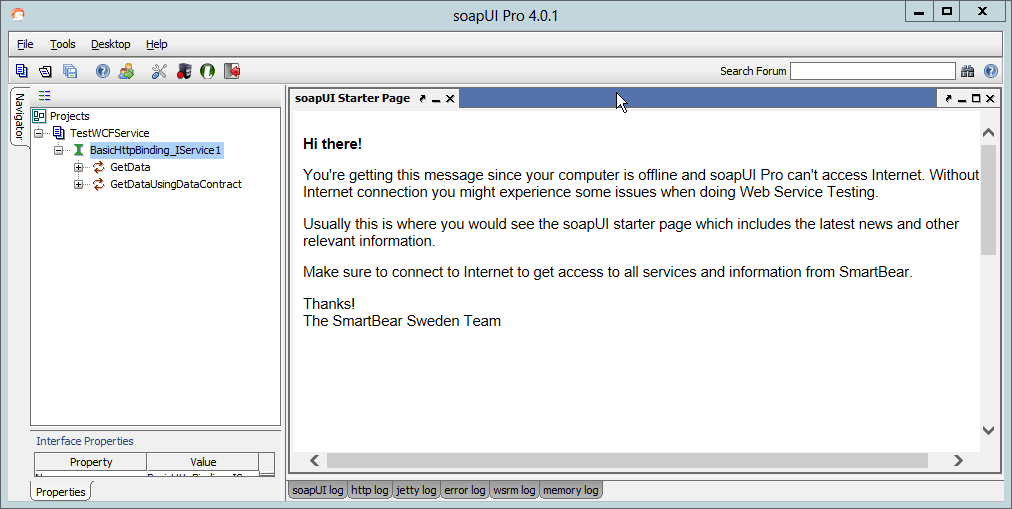
 Press Ok; a new soapui project will be created. See the image below:

Now you can execute the same request as the WCF Test Client did; but there is more; much more!

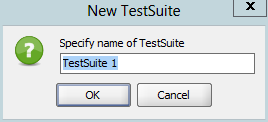
Right click on the WCFTestService1 and choose New TestSuite.

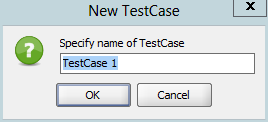
Press OK. Right click on TestSuite 1 and choose New TestCase:

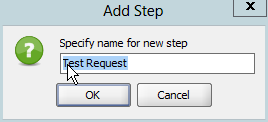
Press OK. Right click on Test Steps choose Add step and then Test request.

Press OK. Choose the operation you want to test:

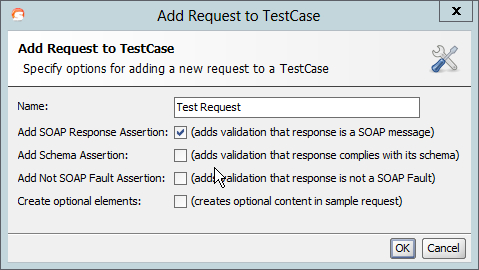
Press OK. On the next screen leave things as suggested

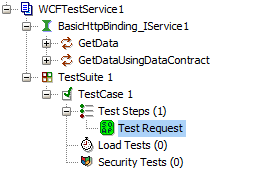
Press OK. Your first test request is added to the TestCase.  By double clicking the TestCase 1 item and pressing the play button the test will be excuted. As you expected the test will succeed and a green icon is shown right before the test request entry:

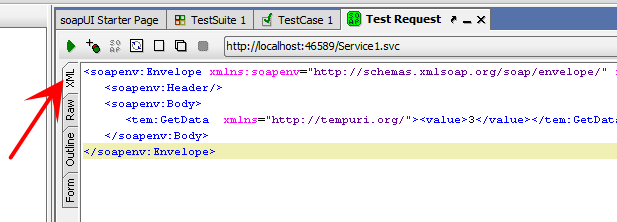
Now lets add some testdata to the request. Place the following XML in the test request XML window. First select the xml view:

Now paste the XML below into the request:

<soapenv:Envelope xmlns:soapenv="http://schemas.xmlsoap.org/soap/envelope/" xmlns:tem="http://tempuri.org/">
<soapenv:Header/>
<soapenv:Body>
<tem:GetData xmlns="http://tempuri.org/"><value>3</value></tem:GetData>
</soapenv:Body>
</soapenv:Envelope>

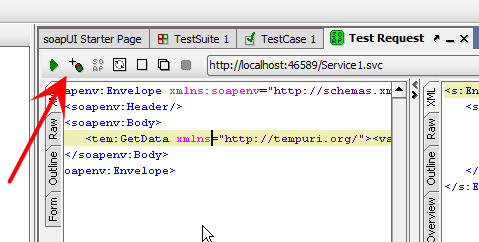
Now you can add assertions to your test script to make sure the operations works the way you want. For example lets assert that the GetDataResult field contains the text “You entered: 3”. Press the plus sign next to the play button:

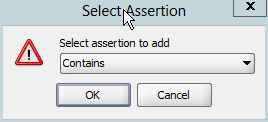
Select the SOAP response assertion:

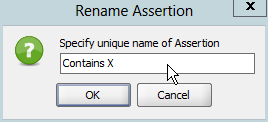
Give the assertiona unique name:

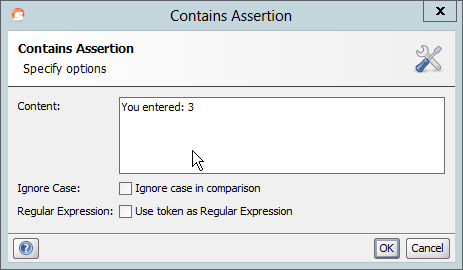
Type the text you want to look for in the response.

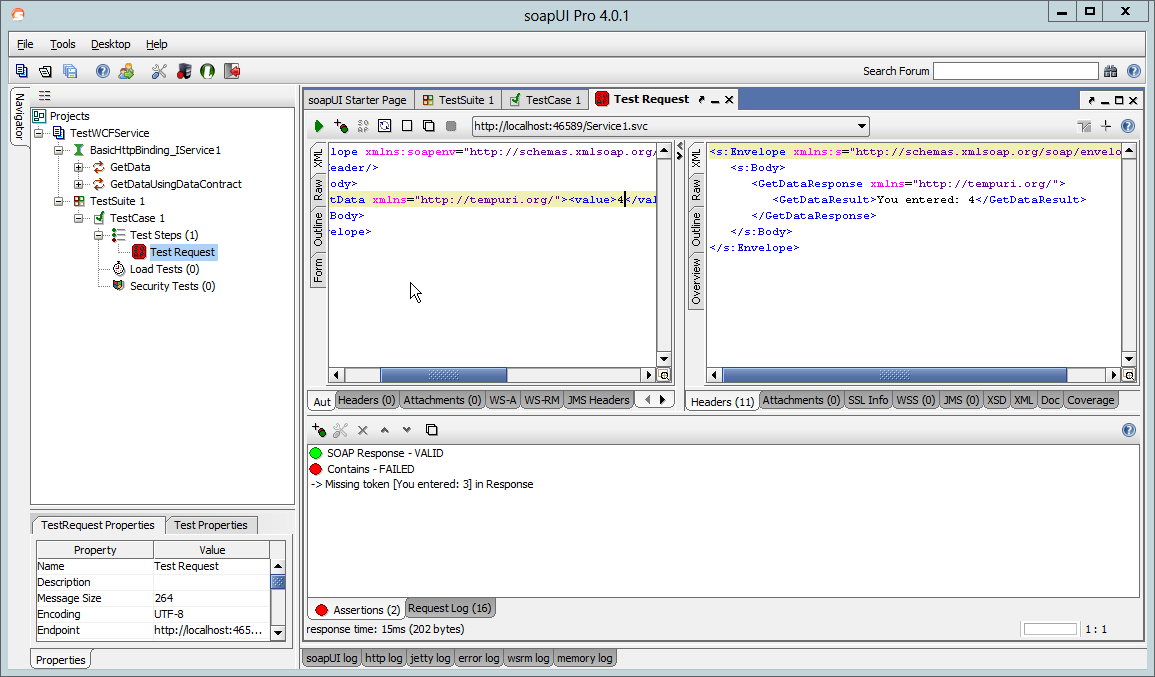
Now if you execute the request it will still succeed because the request contains the number three. Change this number to, for example 4, and you will see that the assertion fails.

Share

Create eventlog on commandline

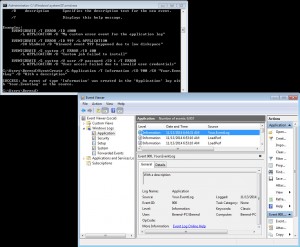
With the command below you can easily create a new windows eventlog. The command creates an informational event in the specified source; automatically creating the source if it does not exist.

EventCreate /L Application /T Information /ID 900 /SO "Your.Eventlog" /D "With a description"

EventLogCreate
/L The eventlog to create an event inEvent
/T Information
/ID The event ID for the event
/SO The source for the event
/D is description

Share

Working with Visual Studio 2010 and github on Synology

gitInstall the “GIT server”  package on your Synology Disk Station. Goto the package center and search for the “Git Server” package. Download and install it.

Install GitExtensions on your dev box.

Install the latest msysgit on your dev box.

Install the “Git Source Control Provider”  Visual Studio 2010 extension on your dev box. In Visual Studio goto Tools -> Extensions and search for “Git Source Control Provider” in the online gallery.

Now SSH to your Synology (either with putty or with a Linux terminal) and execute the following commands:

cd /volume1/
mkdir git
cd git
mkdir repo1.git
cd repo1.git
git --bare init
cd ..
chown -R johndoe:users repo1.git

This will create a so called “bare git” repository. A bare git repository can be used as a central repository to which you push your local repositories.

Ok; now there is a GIT repository created on your Synology. Next create a new Visual Studio solution. Right click the solution name and select “Create Git Repository”. This will add an .git folder to your solution directory and now your solution is in a local Git repository.

Next commit your new solution to the Git repository.Select all files; type your comment and hit “Commit”.

Now push your local repository to the central bare git repository you created earlier. Right click the solution name; choose Git (master) -> Push. The checklist for Git settings will show up if not all settings are valid. For now just click Ok. The Push dialog appears. Specify the remote name; for example: ssh://johndoe@10.0.0.1/volume1/repo1.git

Some useful GIT commands
In Visual Studio goto GIT -> GIT bash; a Bash command prompt will start.
Show available tags:

git tag

Create a tag in the GIT bash:

git tag -a v1.0.2 -m "The new version"

Commit your changes with a message:

git commit -m "Your message / comment"

Push the tag information:

git push --tag

Delete a tag:

git tag -d name_of_the_tag

GIT Use Case

Create bare repo on diskstation

git init --bare repo.git

On a client clone (initialise) a repository from the dskstation:

git clone ssh://git@diskstation.local/volume1/git/repo.git

[Remote “origin”] can be found in .git/config file; you could add an alias for convenience. A directory repo will be created that contains your files. Add files to your repo directory

Add them to the local stage:

git add file.txt

Commit them to the local repo:

git commit -m "Your comment"

Push them to the server repo:

git push origin master

A new branch master will be created. From now on you can use git push (without the origin master)

Share

Scanning an image with C#

This post shows an example of scanning an image with C#. First of all start Visual Studio and create a new console application.scanning software c#

In this example I make use of the standard WIA scanning functionality in Windows 7. Reference the WIA dll in your new project. The dll can be found in the folder “c:\windows\system32\wiaaut.dll”.

The code below scans an image (A4 size) at the default 300 DPI and stores it as an uncompressed TIFF image.

namespace Scanner
{
   using System;
   sing System.Runtime.InteropServices;

   class Program
   {
      const string WIA_DEVICE_PROPERTY_PAGES_ID = "3096";
      const string WIA_DEVICE_PROPERTY_PAGES_ID = "3096";
      const string WIA_HORIZONTAL_SCAN_RESOLUTION_DPI = "6147";
      const string WIA_VERTICAL_SCAN_RESOLUTION_DPI = "6148";
      const string WIA_HORIZONTAL_SCAN_START_PIXEL = "6149";
      const string WIA_VERTICAL_SCAN_START_PIXEL = "6150";
      const string WIA_HORIZONTAL_SCAN_SIZE_PIXELS = "6151";
      const string WIA_VERTICAL_SCAN_SIZE_PIXELS = "6152";
      const string WIA_SCAN_BRIGHTNESS_PERCENTS = "6154";
      const string WIA_SCAN_CONTRAST_PERCENTS = "6155";
      const int widthA4at300dpi = 2480;
      const int heightA4at300dpi = 3508;

      static void Main(string[] args)
      {
         WIA.CommonDialogClass commonDialogClass = new WIA.CommonDialogClass();
         WIA.Device scannerDevice = null;

         try
         {
             scannerDevice = 
                commonDialogClass.ShowSelectDevice(
                   WIA.WiaDeviceType.ScannerDeviceType,
                   false, 
                   false);

             SetWIAProperty(scannerDevice.Properties, WIA_DEVICE_PROPERTY_PAGES_ID, 1);
             WIA.Item scannnerItem = scannerDevice.Items[1];

             SetA4(scannnerItem.Properties, 300);

             WIA.ImageFile scanResult = 
                commonDialogClass.ShowTransfer(
                   scannnerItem, 
                   WIA.FormatID.wiaFormatTIFF, 
                   false);

             scanResult.SaveFile("output.tiff");
         }
         catch (COMException ex)
         {
            if ((uint)ex.ErrorCode == 0x80210015)
            {
               Console.WriteLine("No scanner attached");
            }
            else
            {
               Console.WriteLine("Unknown error: {0}", (uint)ex.ErrorCode);
            }
         }
      }

      private static void SetA4(WIA.IProperties properties, int dpi)
      {
            int width = (int)((widthA4at300dpi / 300.0) * dpi);
            int height = (int)((heightA4at300dpi / 300.0) * dpi);

            SetWIAProperty(properties, WIA_HORIZONTAL_SCAN_RESOLUTION_DPI, dpi);
            SetWIAProperty(properties, WIA_VERTICAL_SCAN_RESOLUTION_DPI, dpi);
            SetWIAProperty(properties, WIA_HORIZONTAL_SCAN_START_PIXEL, 0);
            SetWIAProperty(properties, WIA_VERTICAL_SCAN_START_PIXEL, 0);
            SetWIAProperty(properties, WIA_HORIZONTAL_SCAN_SIZE_PIXELS, width);
            SetWIAProperty(properties, WIA_VERTICAL_SCAN_SIZE_PIXELS, height);
       }

       private static void SetWIAProperty(WIA.IProperties properties, 
              object propName, object propValue)
       {
          WIA.Property prop = properties.get_Item(ref propName);
          prop.set_Value(ref propValue);
       }
    }
}


Share

Visual Studio Tips & Tricks

Visual Studio tips and tricks.

Visual Studio
This article contains tips and tricks about Visual Studio. Tips are collected during day to day work with Visual Studio.

Searching with regular expression

Type Ctrl-F, in Find Options select Regular expression instead of “Wild card”
Type your regular expression; for example [.]isual studi[.]
The default behavior is greedy matching; to use non-greedy matching use the @ (instead of *) or
the # (instead of .)

Keyboard short-cuts

Show command window Ctrl-Alt-A
Cycle through clipboard buffer Ctrl-Shift-V
Toggle display whitespace Ctrl-R, Ctrl-W
Show options for smart-tag Ctrl-.

Various tips and tricks

To start a shell from visual studio open the command window (Crl-W,A). Type “Tools.Shell cmd”.

Share

Configure IIS Website with SSL

To secure your website you can use SSL and certificates. In this post I will explain in detail how to setup your site to use a certificate, including the details of installing your own Certification Authority. Finally I will show you some C# code to work with certificates.

Part 1 will show you how to install the Certificate Authority on a Windows 2003 machine, part 2 is about creating a new website,
part 3
shows how to request a webserver certificate,
part 4 shows you how to send the request to the Certification Authority,
part 5
shows you how the CA processes the request,
part 6
shows you how to download and install the certificate on the website, 
part 7
shows you how to create a virtual folder.
Part 8 shows you how to test ths site together with some coding examples in C#.

Share

Enable the ASP.NET page again

asp.net.logoSometimes your ASP.NET tab disappears in the IIS manager. To show this tab again follow the steps below.

Steps involved

  1. Stop the IIS Admin service (and any services that depend on it)
  2. Open C:WINDOWSsystem32inetsrvMetaBase.xml in notepad or your favorite XML Editor. DELETE the line that reads ‘Enable32BitAppOnWin64=”TRUE”‘
  3. Start -> Run -> iisreset
Share