Add a Resources folder and add two files with this folder: Views.Home.Index.en.resx Views.Home.Index.nl.resx
Add an entry WelcomeText to both files. With a dutch value in the nl.resx file and an english value in the en.resx file.
Now update your startup.cs to support multiple languages. Edit your Program.cs in the root of the project file. Add this code right before var app = builder.Build();
// Add services to the container.
builder.Services.AddLocalization(options => options.ResourcesPath = "Resources");
builder.Services.AddControllersWithViews()
    .AddViewLocalization(LanguageViewLocationExpanderFormat.Suffix)
    .AddDataAnnotationsLocalization();

builder.Services.AddLocalization(options => options.ResourcesPath = "Resources");

builder.Services.Configure<RequestLocalizationOptions>(options =>
{
    var supportedCultures = new[] { new CultureInfo("en"), new CultureInfo("nl") };
    options.DefaultRequestCulture = new RequestCulture("en");
    options.SupportedCultures = supportedCultures;
    options.SupportedUICultures = supportedCultures;
});
And this code right before app.Run();
var supportedCultures = new[] { new CultureInfo("en"), new CultureInfo("nl") };
var localizationOptions = new RequestLocalizationOptions
{
    DefaultRequestCulture = new RequestCulture("en"),
    SupportedCultures = supportedCultures,
    SupportedUICultures = supportedCultures
};

app.UseRequestLocalization(localizationOptions);
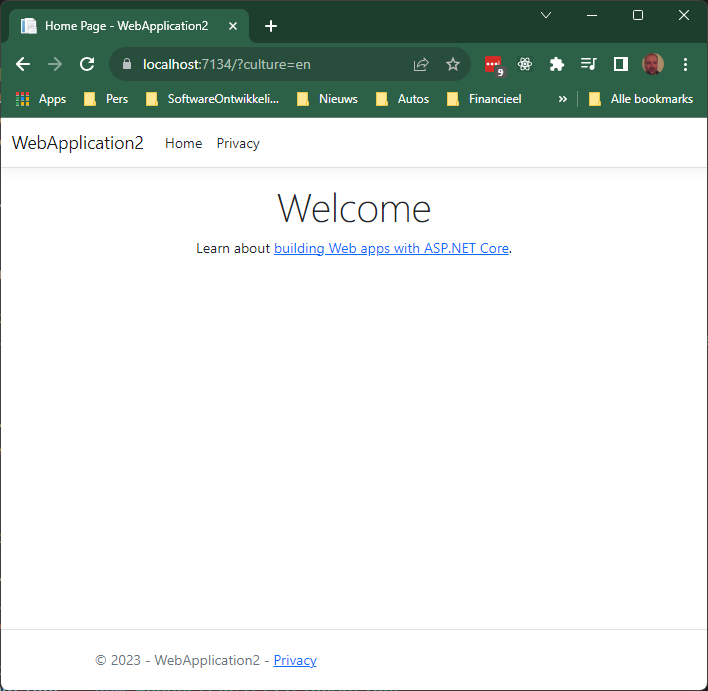
That’s it. Now you can switch between languages by adding ?culture=en or ?culture-nl to your url.
Below is an example of creating a Chroma vector database using a TextSplitter with a simple text string.
from dotenv import load_dotenv
from langchain.vectorstores import Chroma
from langchain.text_splitter import RecursiveCharacterTextSplitter
from langchain.embeddings import OpenAIEmbeddings

load_dotenv()

# https://platform.openai.com/docs/guides/embeddings/use-cases
embeddings = OpenAIEmbeddings(model="text-embedding-ada-002")

text_splitter = RecursiveCharacterTextSplitter(
    chunk_size=10,  # default: 4000
    chunk_overlap=2  # default: 200
)

texts = text_splitter.create_documents(
    texts=['Often times your document is too long (like a book) for your LLM. You need to split it up into chunks. Text splitters help with this.'])

vectordb = Chroma.from_documents(
    documents=texts, embedding=embeddings, persist_directory="./dbtest")
You can also include PDF documents in your Chroma database. See the code below.
import os
from dotenv import load_dotenv
from langchain.vectorstores import Chroma
from langchain.document_loaders import DirectoryLoader
from langchain.document_loaders import PyPDFLoader
from langchain.text_splitter import RecursiveCharacterTextSplitter
from langchain.embeddings import OpenAIEmbeddings

load_dotenv()

if not any(file.endswith('.pdf') for file in os.listdir('.')):
    exit(1)

# https://platform.openai.com/docs/guides/embeddings/use-cases
embeddings = OpenAIEmbeddings(model="text-embedding-ada-002")

text_splitter = RecursiveCharacterTextSplitter(
    chunk_size=2000,  # default: 4000
    chunk_overlap=100  # default: 200
)

loader = DirectoryLoader(".", glob='./*.pdf', loader_cls=PyPDFLoader)
documents = loader.load()

texts = text_splitter.split_documents(documents)

vectordb = Chroma.from_documents(
    documents=texts, embedding=embeddings, persist_directory="./dbtest")
The Decorator pattern allows you to dynamically add additional behavior or features to an object at runtime. In the context of a car, let’s create an example with a base Car class, a SportsCar class, and a LuxuryCar class. We’ll use decorators to add extra features to the cars.
First, let’s define the base Car class:
public interface ICar
{
    string GetDescription();
    double GetCost();
}

public class Car : ICar
{
    public string GetDescription()
    {
        return "Basic Car";
    }

    public double GetCost()
    {
        return 20000.0;
    }
}
Next, we’ll create the SportsCar class, which will act as a decorator and add sports car features:
public class SportsCar : ICar
{
    private readonly ICar _car;

    public SportsCar(ICar car)
    {
        _car = car;
    }

    public string GetDescription()
    {
        return _car.GetDescription() + ", Sports Car";
    }

    public double GetCost()
    {
        return _car.GetCost() + 15000.0;
    }
}
Now, let’s create the LuxuryCar class, which will be another decorator to add luxury features:
public class LuxuryCar : ICar
{
    private readonly ICar _car;

    public LuxuryCar(ICar car)
    {
        _car = car;
    }

    public string GetDescription()
    {
        return _car.GetDescription() + ", Luxury Car";
    }

    public double GetCost()
    {
        return _car.GetCost() + 30000.0;
    }
}
Finally, we can use the decorators to create different car configurations:
// Creating a basic car
ICar basicCar = new Car();
Console.WriteLine("Description: " + basicCar.GetDescription());
Console.WriteLine("Cost: $" + basicCar.GetCost());

// Adding sports car features to the basic car
ICar sportsCar = new SportsCar(basicCar);
Console.WriteLine("Description: " + sportsCar.GetDescription());
Console.WriteLine("Cost: $" + sportsCar.GetCost());

// Adding luxury features to the sports car
ICar luxuryCar = new LuxuryCar(sportsCar);
Console.WriteLine("Description: " + luxuryCar.GetDescription());
Console.WriteLine("Cost: $" + luxuryCar.GetCost());
Output:
Description: Basic Car
Cost: $20000
Description: Basic Car, Sports Car
Cost: $35000
Description: Basic Car, Sports Car, Luxury Car
Cost: $65000
Below is an example of using a PromptTemplate in LangChain
from dotenv import load_dotenv
from langchain.chat_models import ChatOpenAI
from langchain.chains import LLMChain
from langchain.prompts import PromptTemplate
from langchain.chains import SimpleSequentialChain

load_dotenv()

template = """
You are a senior programmer with an expertise in {lang}.
Implement the function below in the {lang} programming language:

Find the first four prime numbers

"""

prompt = PromptTemplate(
    input_variables=["lang"],
    template=template,
)

second_prompt = PromptTemplate(
    input_variables=["lang"],
    template="Convert the function {lang} below to a textual representation",
)

llm = ChatOpenAI(model_name="gpt-4")

chain = LLMChain(llm=llm, prompt=prompt)

chain_two = LLMChain(llm=llm, prompt=second_prompt)

overall_chain = SimpleSequentialChain(chains=[chain, chain_two], verbose=True)

print(overall_chain.run("c#"))
First of all install the langchain tool. LangChain is a framework for developing applications powered by language models.
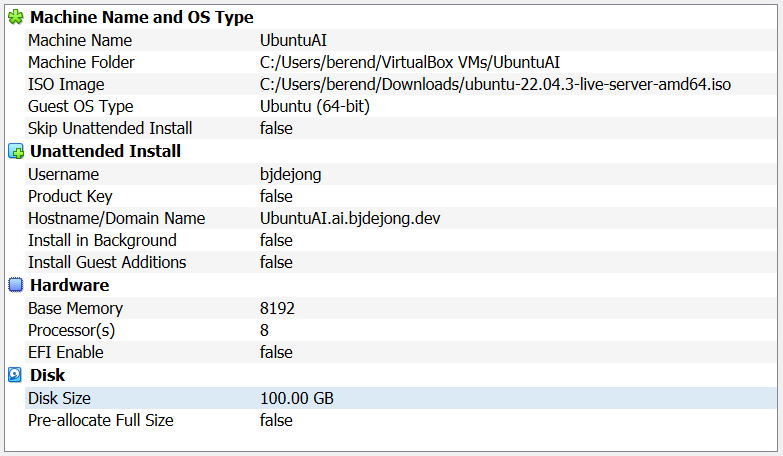
I started with a brand new Ubuntu 22.04 server installation. Download the server here and install with everything default. Be sure to install the OpenSSH server.
I used virtual box to host the Ubuntu machine.
After installation (could take a while) spin the machine up and connect to it from a Windows terminal (better GUI) with ssh. If you cannot connect to your new virtual machine change the Network adapter setting from NAT to Bridged.
Ubuntu comes with python install, check version:
python3 --version
# Python 3.10.12
First of all install pip onto your new virtual machine:
Now your environment is setup. We can start to build a vector database with a sample PDF. Download for example this PDF. Then create a python script as shown below:
from dotenv import load_dotenv
from langchain.vectorstores import Chroma
from langchain.document_loaders import DirectoryLoader
from langchain.document_loaders import PyPDFLoader
from langchain.text_splitter import RecursiveCharacterTextSplitter
from langchain.embeddings import OpenAIEmbeddings

load_dotenv()

embeddings = OpenAIEmbeddings(model="text-embedding-ada-002")

loader = DirectoryLoader(".", glob='./*.pdf', loader_cls=PyPDFLoader)
documents = loader.load()

text_splitter = RecursiveCharacterTextSplitter()
texts = text_splitter.split_documents(documents)

vectordb = Chroma.from_documents(documents=texts,
   embedding=embeddings, persist_directory="./db")
The script above will create a SQLite database in the db subfolder. It reads all the pdf files in the current folder and stores them in de SQLite database as embeddings.
Now we can start querying out PDF (database). The script below is an example of how to query your PDF through the use of the vector database.
import argparse
from langchain.chains import RetrievalQA
from langchain.embeddings import OpenAIEmbeddings
from langchain.chat_models import ChatOpenAI
from langchain.vectorstores import Chroma
from langchain.prompts import PromptTemplate
from dotenv import load_dotenv

load_dotenv()

chroma_db_directory = "./db"

parser = argparse.ArgumentParser(
    description="Returns the answer to a question.")
parser.add_argument("query", type=str, help="The query to be asked.")

args = parser.parse_args()

embedding = OpenAIEmbeddings()

vectordb = Chroma(persist_directory=chroma_db_directory,
                      embedding_function=embedding)
retriever = vectordb.as_retriever(search_kwargs={"k": 10})

prompt_template = """
Use the following pieces of context to answer the question at the end.
If you don't know the answer, just say that you don't know and nothing else.
Don't try to make up an answer.
Answer questions only when related to the context.

{context}

Question: {question}
"""
PROMPT = PromptTemplate(template=prompt_template,
    input_variables=["context", "question"])

chain_type_kwargs = {"prompt": PROMPT}
qa_chain = RetrievalQA.from_chain_type(
    llm=ChatOpenAI(model_name="gpt-4",
    temperature=0, verbose=True),
    chain_type="stuff",
    retriever=retriever,
    chain_type_kwargs=chain_type_kwargs,
    verbose=False,
    return_source_documents=True)

llm_response = qa_chain(args.query)

print(llm_response["result"])
You can now ask question about the PDF, for example:
python3 q.py "What does LSP mean?"
# LSP stands for Liskov Substitution Principle. It is a principle in object-oriented programming that states functions that use pointers or references to base classes must be able to use objects of derived classes without knowing it. This principle was first introduced by #Barbara Liskov. Violating this principle can lead to issues in the program, as functions may need to know about all derivatives of a base class, which violates the Open-Closed principle.

python3 q.py "Who is Barbara Liskov?"
# Barbara Liskov is a computer scientist who first wrote the Liskov Substitution Principle around 8 years prior to the context provided.

python3 q.py "Create a summary of 10 words"
The Liskov Substitution Principle is crucial for maintainable, reusable OOD.
The three lifetime registrations for the out of the box DI functionality:
singleton (one and only forever)
scoped (one in every request)
transient (new everytime).
In the code below three objects are added to the DI container, a singleton, a scoped and a transient item.
When you run this code you can observe that the singleton is always the same date (even on different browser tabs). The scoped object will have the same date during the request, even when retrieved multiple times from the DI container it will have the same date and time. The transient object however will have a different date and time each time it is retrieved from the DI container.
using System;
using System.Threading.Tasks;
using Microsoft.AspNetCore.Builder;
using Microsoft.AspNetCore.Http;
using Microsoft.Extensions.DependencyInjection;

var builder = WebApplication.CreateBuilder();

builder.Services.AddSingleton(x => new SingletonDate());
builder.Services.AddTransient(x => new TransientDate());
builder.Services.AddScoped(x => new ScopedDate());

var app = builder.Build();

app.Use(async (context, next) =>
{
    var single = context.RequestServices.GetService<SingletonDate>();
    var scoped = context.RequestServices.GetService<ScopedDate>();
    var transient = context.RequestServices.GetService<TransientDate>();

    await context.Response.WriteAsync("Open this page in two tabs \n");
    await context.Response.WriteAsync("Keep refreshing and you will see the three different DI behaviors\n");
    await context.Response.WriteAsync("----------------------------------\n");
    await context.Response.WriteAsync($"Singleton : {single.Date.ToString("MM/dd/yyyy hh:mm:ss.fff tt")}\n");
    await context.Response.WriteAsync($"Scoped: {scoped.Date.ToString("MM/dd/yyyy hh:mm:ss.fff tt")}\n");
    await context.Response.WriteAsync($"Transient: {transient.Date.ToString("MM/dd/yyyy hh:mm:ss.fff tt")}\n");
    await next.Invoke();
});

app.Run(async (context) =>
{
    await Task.Delay(3000);//delay for 100 ms

    var single = context.RequestServices.GetService<SingletonDate>();
    var scoped = context.RequestServices.GetService<ScopedDate>();
    var transient = context.RequestServices.GetService<TransientDate>();

    await context.Response.WriteAsync("----------------------------------\n");
    await context.Response.WriteAsync($"Singleton : {single.Date.ToString("MM/dd/yyyy hh:mm:ss.fff tt")}\n");
    await context.Response.WriteAsync($"Scoped: {scoped.Date.ToString("MM/dd/yyyy hh:mm:ss.fff tt")}\n");
    await context.Response.WriteAsync($"Transient: {transient.Date.ToString("MM/dd/yyyy hh:mm:ss.fff tt")}\n");
});

app.Run();

public class SingletonDate
{
    public DateTime Date { get; set; } = DateTime.Now;
}

public class TransientDate
{
    public DateTime Date { get; set; } = DateTime.Now;
}

public class ScopedDate
{
    public DateTime Date { get; set; } = DateTime.Now;
}
You can register all classes in a project (or folder) that implement a certain interface. See the code below how to do this.
using System.Linq;
using Microsoft.AspNetCore.Builder;
using Microsoft.AspNetCore.Http;
using Microsoft.Extensions.DependencyInjection;

var builder = WebApplication.CreateBuilder();

var type = typeof(IBootstrap);
var types = System.AppDomain.CurrentDomain.GetAssemblies()
    .SelectMany(x => x.GetTypes())
    .Where(p => type.IsAssignableFrom(p) && p.IsClass);

foreach (var p in types)
{
    var config = (IBootstrap)System.Activator.CreateInstance(p)!;
    config.Register(builder.Services);
}

var app = builder.Build();

app.Run(context =>
{
    var person = context.RequestServices.GetService<Person>()!;
    var greeting = context.RequestServices.GetService<Greeting>()!;

    return context.Response.WriteAsync($"{greeting.Message} {person.Name}");
});

app.Run();

public interface IBootstrap
{
    void Register(IServiceCollection services);
}

public class Registration1 : IBootstrap
{
    public void Register(IServiceCollection services)
    {
        services.AddTransient(x => new Person { Name = "Mahmoud" });
    }
}

public class Registration2 : IBootstrap
{
    public void Register(IServiceCollection services)
    {
        services.AddTransient(x => new Greeting { Message = "Good Morning" });
    }
}

public class Person
{
    public string Name { get; set; } = string.Empty;
}

public class Greeting
{
    public string Message { get; set; } = string.Empty;
}
Also add a .editorconfig to your solution to configure your code styling. The StyleCop analyzer and the .editorconfig file play together to configure your build process.