This post describes how to implement Mollie payments in your ASP.NET MVC Web application.

Begin by setting up an account at my.mollie.com. Ensure that you fully complete the registration process, which includes adding at least one payment method.
Following this, launch Visual Studio (or Visual Studio Code) and create a new MVC web application. The next step is to integrate the Mollie API. Do this by adding the NuGet package ‘Mollie.Api‘. As of the writing of this post, the current version is 3.3.0.
Edit your Program.cs and add the Mollie dependency to your container with this code fragment:
builder.Services.AddMollieApi(options =>
{
    options.ApiKey = builder.Configuration["Mollie:ApiKey"];
    options.RetryPolicy =
       MollieHttpRetryPolicies.TransientHttpErrorRetryPolicy();
});
Also add session support to the DI container by adding this code in your Program.cs:
// Immediately after var builder = WebApplication.CreateBuilder(args);
builder.Services.AddSession();

// Immediately after var app = builder.Build();
app.UseSession();
As you can see an app setting is used: Mollie:ApiKey. Add this setting to your user secrets (right click project and choose Manage User Secrets):
{
  "Mollie": {
    "ApiKey": "test_XXXXXXXXXXXXXXXXXXXXXXXXXXXXXX"
  }
}
Next create a folder ViewModels in the root of your project. Within that folder create a subfolder called Home. In this folder create a class called HomeViewModel with this definition:
namespace MollieWebApp.ViewModels.Home;

public class HomeViewModel
{
    public double Amount { get; set; }
    public string Description { get; set; } = string.Empty;
}
Next open your Home/Index view and add a form to start the payment process (use the view model you defined in ViewModels/Home/HomeViewModel):
@model MollieWebApp.ViewModels.Home.HomeViewModel;
@{
    ViewData["Title"] = "Home Page";
}
<div class="row">
    <div class="col">
        <form asp-controller="Home"
              asp-action="CreatePayment" method="post">
            <input asp-for="Amount" />
            <input asp-for="Description" />
            <button type="submit">Create Payment</button>
        </form>
    </div>
</div>
Next goto your Home controller and implement the Index and CreatePayment (post) action. The Index method builds the initial view with some test values. On the Index view we have a submit button that will post its data to the CreatePayment action. The Index action is shown below:
   [HttpGet]
   public IActionResult Index()
   {
       HomeViewModel vm = new() { Amount = 10, Description = "Test payment" };

       return View(vm);
   }
As you can see nothing special about this. Set some defaults and return the View with the HomeViewModel. Next we will implement the CreatePayment action. The CreatePayment action receives a HomeViewModel through the post action and will call the paymentClient (injected in the constructor) to start a payment request. Below the implementation of the CreatePayment action.
 [HttpPost]
 public async Task<IActionResult> CreatePayment(HomeViewModel vm)
 {
     try
     {
         var paymentRequest = new PaymentRequest()
         {
             Amount = new Amount(Currency.EUR, vm.Amount),
             Description = vm.Description,
             RedirectUrl = "https://localhost:7059/Home/PaymentRedirect",
         };

         PaymentResponse paymentResponse =
            await _paymentClient.CreatePaymentAsync(paymentRequest);

         if (paymentResponse != null)
         {
             // Store the payment ID in the session or database
             HttpContext.Session.SetString("PaymentId", paymentResponse.Id);

             // Redirect user to Mollie to complete the payment
             return Redirect(paymentResponse.Links.Checkout.Href);
         }

         vm.Message = "Error starting payment process";
         return View(vm);
     }
     catch (MollieApiException ex)
     {
         vm.Message = ex.Message;
         return View(nameof(Index), vm);
     }
 }
When creating the payment request we specify an RedirectUrl. This URL is used by the Mollie payment provider to return to when the payment has finished. If you want to create a payment with a specific paymentmethod, there are seperate classes that allow you to set paymentmethod specific parameters. For example IdealPaymentRequest.
When we create the payment request through the Mollie API we get a transaction Id in the Id property of the payment response. We need to store this Id to retrieve the status of the payment later on. Here we store the transaction Id in the session.
Next we redirect to the Mollie page that will process our payment request. In test mode we can specifiy what the result of this payment will be. See the screenshot below:
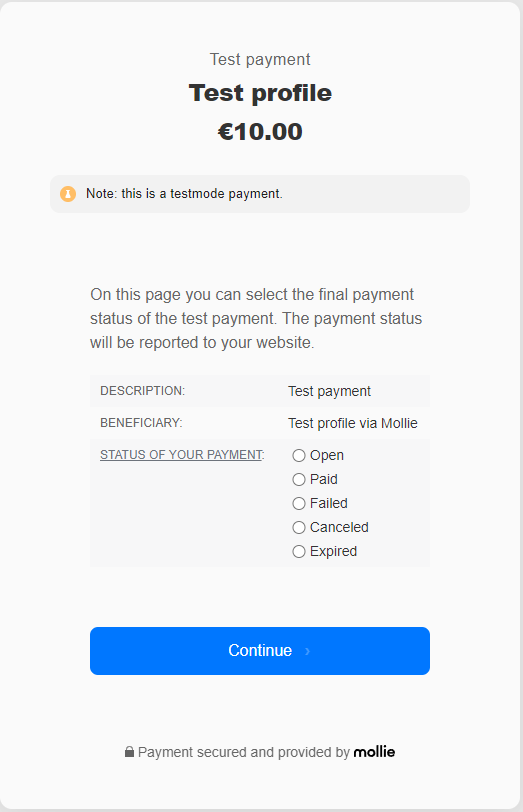
When pressing Continue the payment is processed and the Mollie page will redirect to our redirect url. The redirect url in this example is https://localhost:7059/Home/PaymentRedirect. The action PaymentRedirect on the Home controller will be executed.
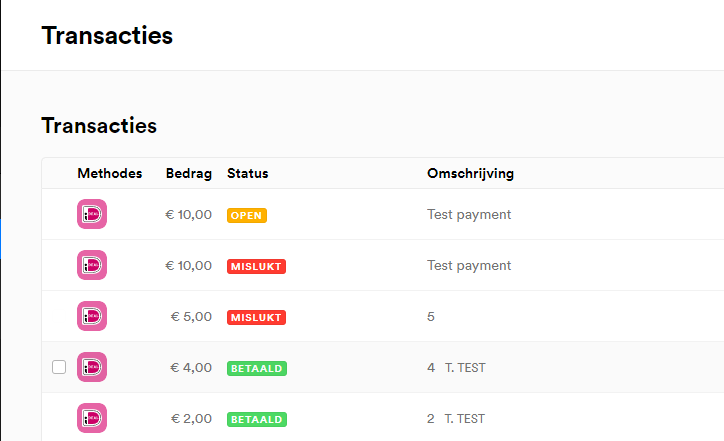
You can view the status of your payment on the Mollie website. Go to the transactions page and you will find an overview of your transactions there.
Here is an example implementation of the PaymentRedirect action:
 [HttpGet]
 public async Task<IActionResult> PaymentRedirect()
 {
     HomeViewModel vm = new HomeViewModel();

     string? id = HttpContext.Session.GetString("PaymentId");

     if (string.IsNullOrEmpty(id))
     {
         vm.Message = "Payment id not available";
         return View(nameof(Index), vm);
     }

     PaymentResponse payment = await _paymentClient.GetPaymentAsync(id);
     if (payment == null)
     {
         vm.Message = $"Payment with id {id} not found";
         return View(nameof(Index), vm);
     }

     vm.Message = $"{payment.Status} ({payment.Amount})";
     return View(nameof(Index), vm);
 }
Webhook and ngrok
When creating the payment request you can also specify a webhook url in the WebHook property of the payment request. This webhook url will be used by Mollie to post your payment details to. There is no need to poll this url, Mollie will call this url if there is an update for your payment request.
Testing the webhook can be done by using ngrok. Create an account on this website, download the ngrok binary for your OS and start it (on windows) with:
.\ngrok http https://localhost:7097
Be sure to use the full url to your website (not only the port number) otherwise this will not work(!)
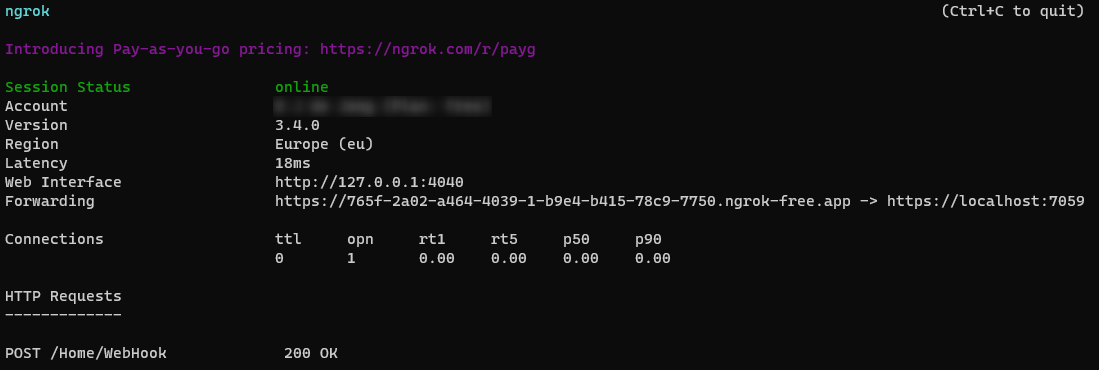
Now add this url (the https://765f……../Home/WebHook) to your paymentRequest as the WebHookUrl:
                var paymentRequest = new PaymentRequest()
                {
                    Amount = new Amount(Currency.EUR, vm.Amount),
                    Description = vm.Description,
                    RedirectUrl = "https://localhost:7097/Payment/Redirect",
                    WebhookUrl = "https://9999-9999-9999-9999-9-9999-9999-9999-9999.ngrok-free.app/Home/Webhook"
                };
The URL to the ngrok service will be different everytime you start the ngrok executable. The GUID will be different on every start. In this example we have implemented the WebHook on the Home controller, hence the /Home/Webhook at the end of the URL.
Now Mollie will call this url and you are able to test your webhook url thanks to ngrok. Mollie will keep calling this URL until we deliver a 200 response to Mollie (see also this retry schema).
An exampe implementation of the WebHook url is shown below. Important to note that this is a POST action and it has one parameter (from the post) with name Id. Mollie sends as the transaction Id in this variable. Format of this id is “tr_zMYyzzx8xg“.
[HttpPost]
public async Task<IActionResult> WebHook(string id)
{
    PaymentResponse paymentResponse = await _paymentClient.GetPaymentAsync(id);

    _logger.LogInformation("Transaction {id}, status = {status}", id, paymentResponse.Status);

    return Ok();
}
The Mollie payment API can be found here, the GitHub page for the Mollie.API can be found here.
