In this post I will show you how to
- Create a sample .net core 3.0 website.
- Deploy a website to an Azure App Service.
- Assign a custom domain.
- Enable Let’s Encrypt certificate
Create a sample .net core 3.0 website
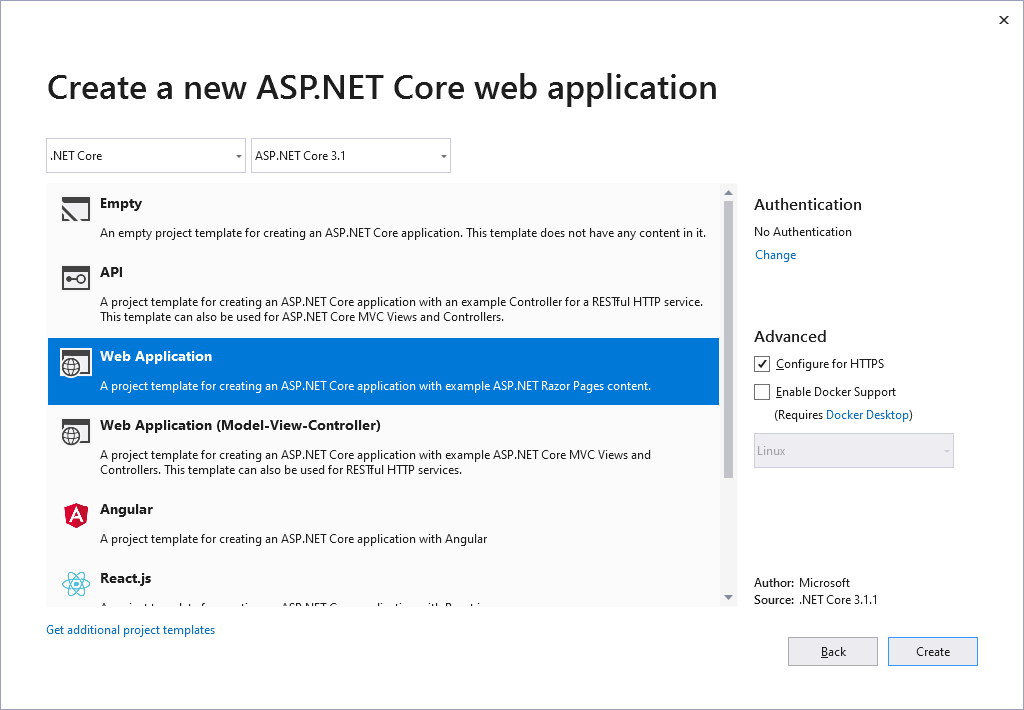
Startup Visual Studio 2019 and create a new project. Choose “ASP.NET Core Web Application” as your project template.
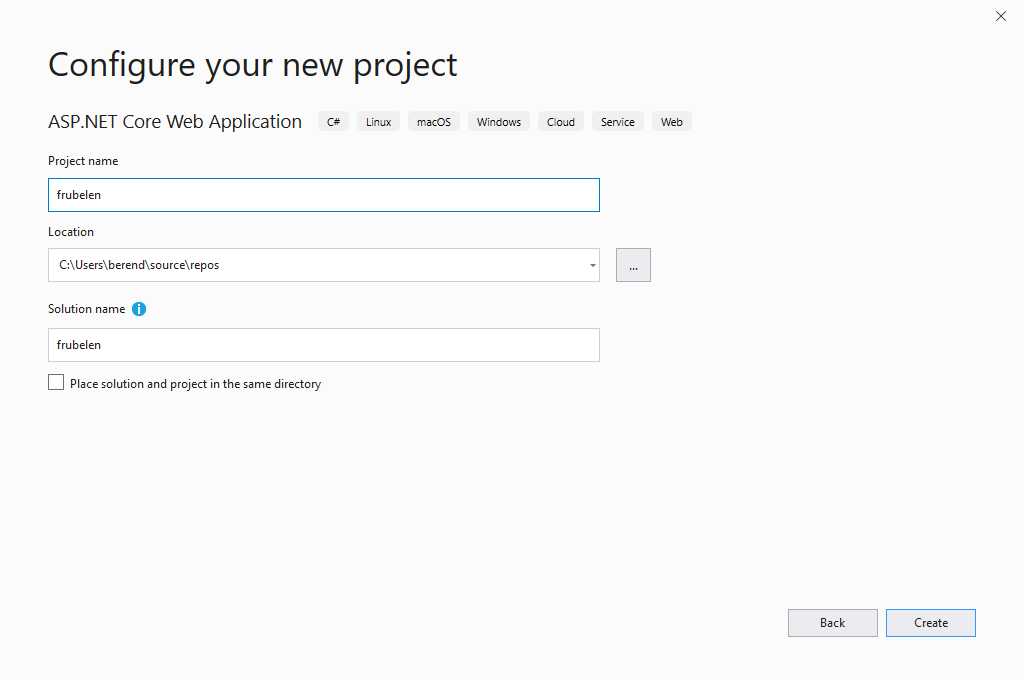
Press Create. Then choose “Web Application” .
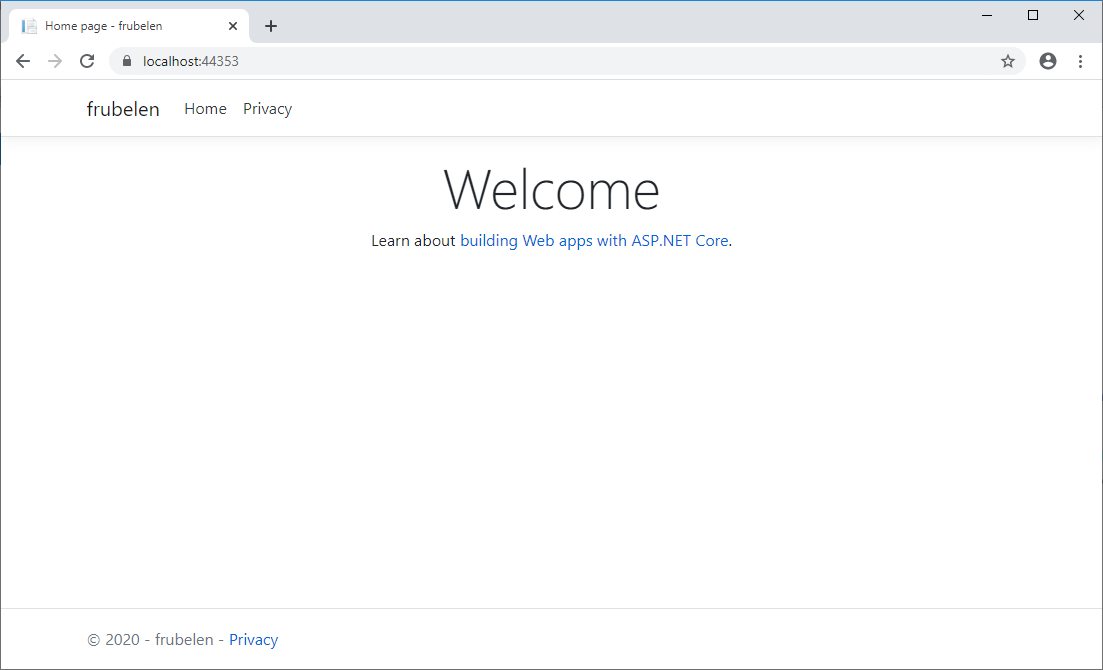
Pres Create and Visual Studio opens with an overview screen of your new ASP.NET Core application. Press F5 to see it in action.
Now it is time to publish (or deploy) your (skeleton) application to Azure.
Deploy website to Azure
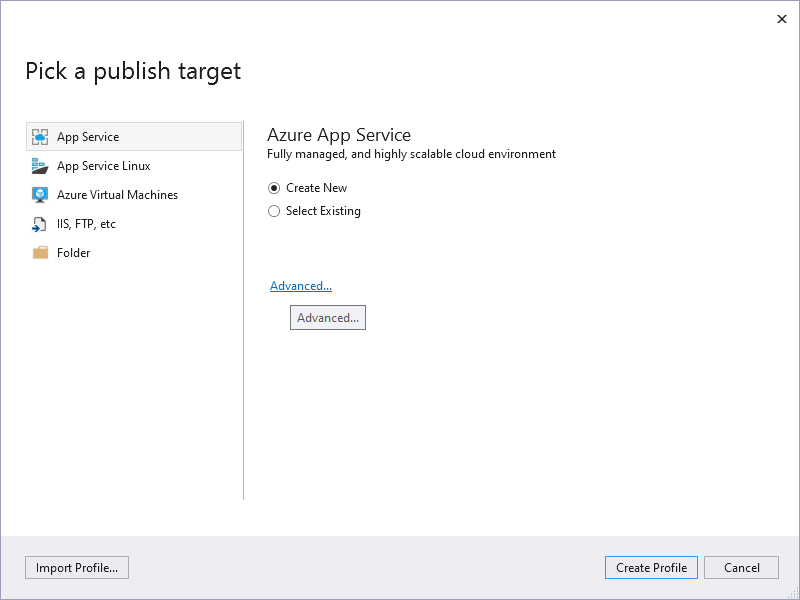
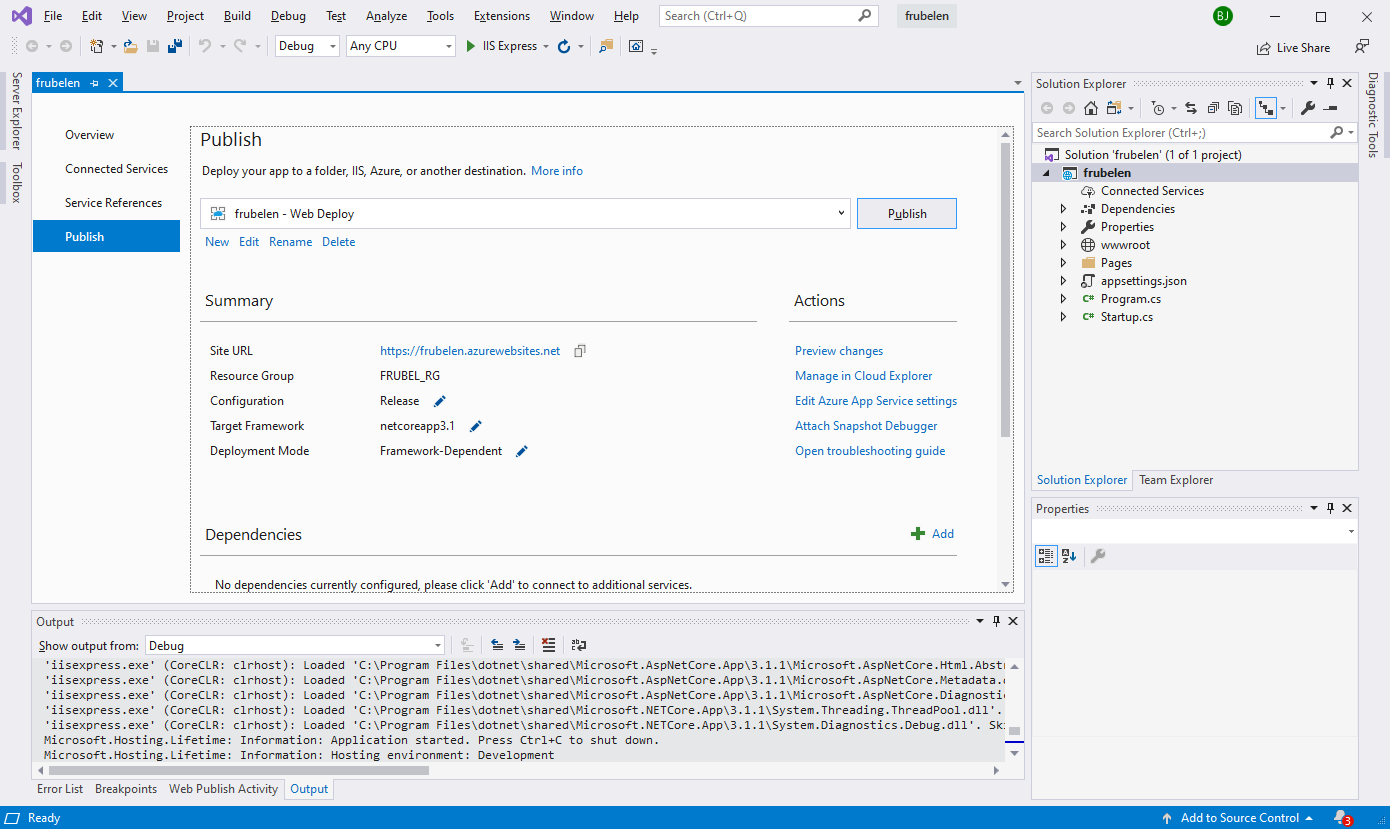
Deploying your website to Azure is simple. Right click on the solution and select Publish. Make sure App Service and Create New is selected and press Create Profile.
Now we have to fill in the details for the App Service. Please fill out the screen as you see fit.
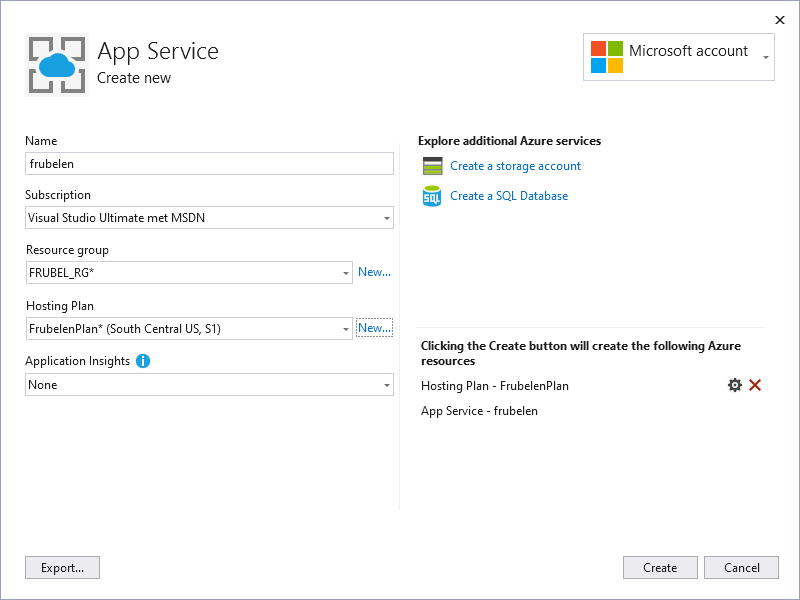
Press Create and wait for the App Service to be created (this could take a while). When the window closes the App Service is created. Now it is time to publish the website to this app service. Press Publish
After a few moments the website is published and visual studio will start a new browser and open the website from the Azure environment.
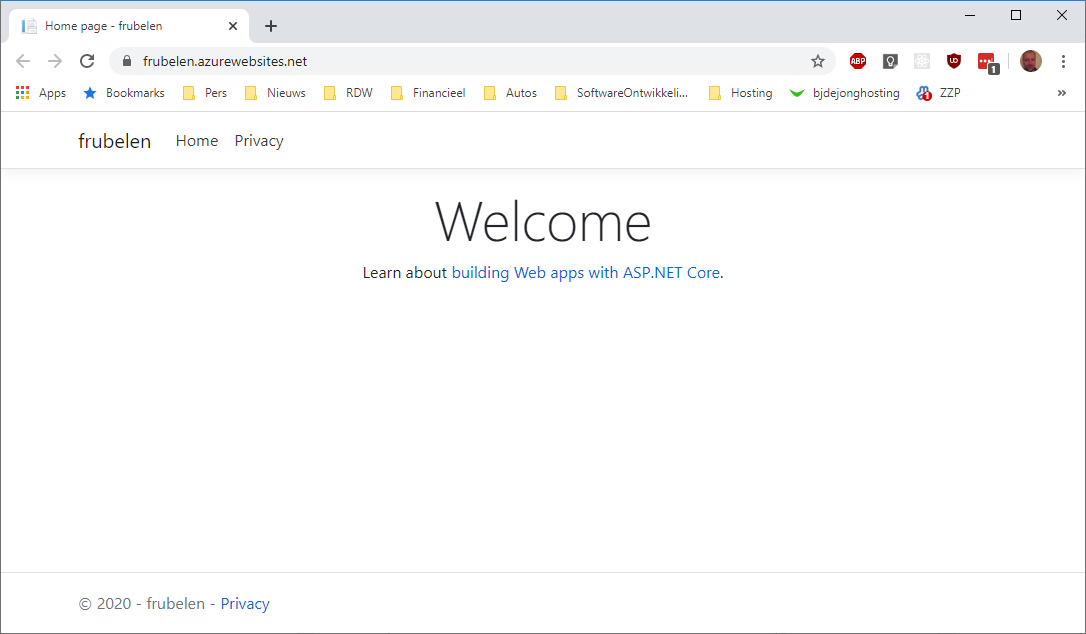
As you can see the site has a domain name of “frubelen.azurewebsites.net”. Now it is time to assign our custom domain name to this site. After doing this we can send our browser to azure.frubelen.nl (for example) instead of the azure domain.
Assign a custom domain
Now we are going to assing our custom domain name. First of all you will have to decide if you want to assign the domain to the azure website or a subdomain.
If you want to assign the entire domain (not a subdomain) to this azure site you will have to create an A record at your dns provider. If you only want this azure site for a subdomain you should create a alias record, a CNAME record.
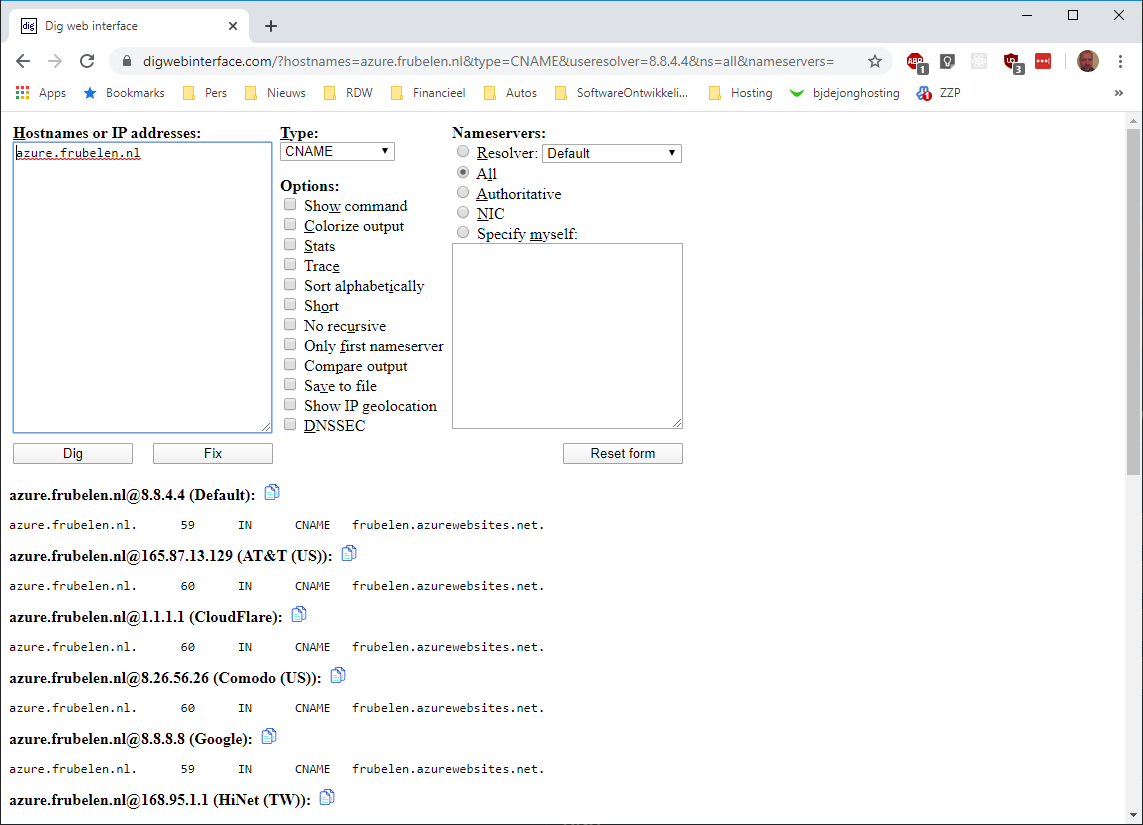
I have choosen to only send the subdomain azure.frubelen.nl to this site so I create a CNAME record at my DNS provider:

After changing your DNS registration it takes some time before all DNS servers have received this change. To check if DNS servers have received the change you could send your browser to https://digwebinterface.com/
Now go back to the azure portal and navigate to your App Service and select Custom Domains.
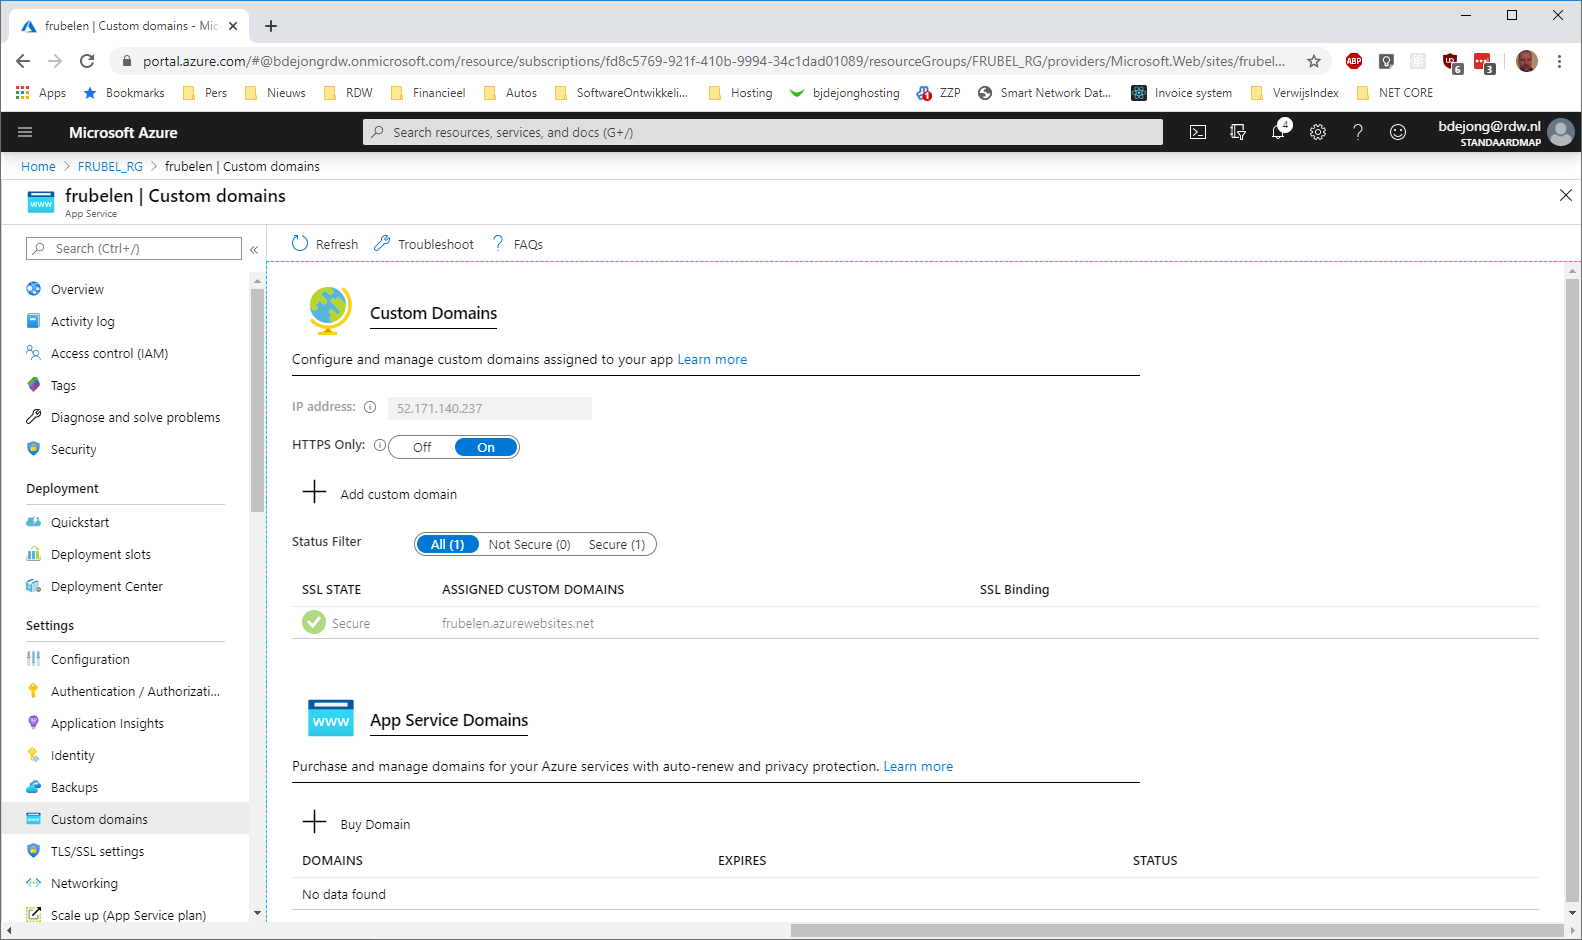
Press on “Add custom domain”. Fill in your subdomain to redirect to azure. In my example it is “azure.frubelen.nl”. Press Validate to let Azure retrieve the DNS records for the domain.
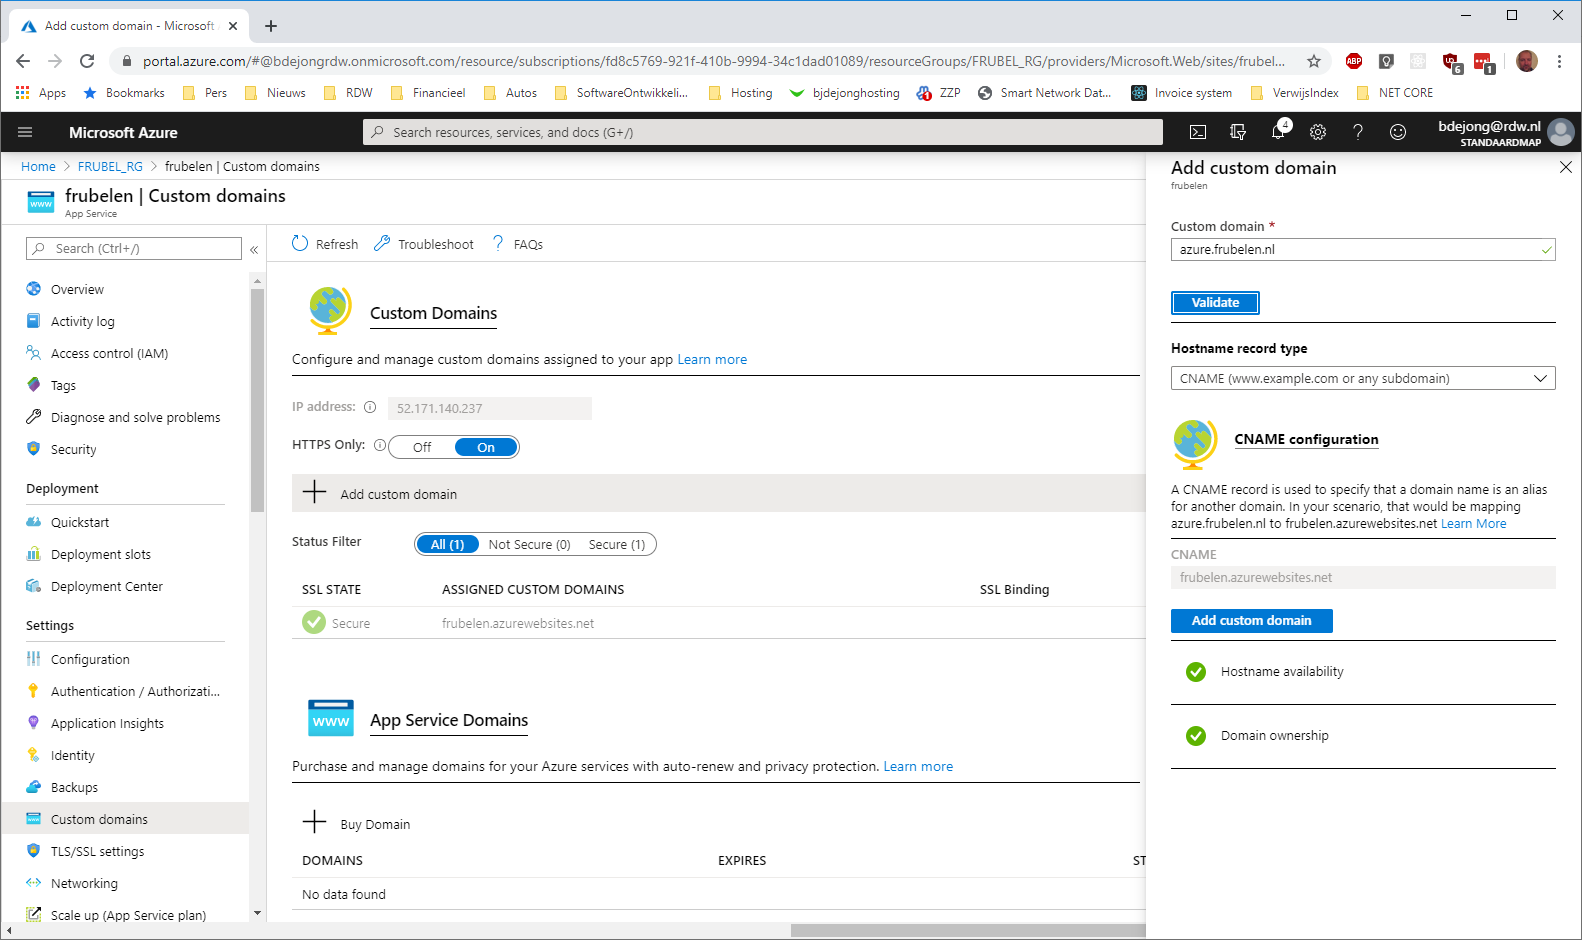
If the DNS servers are updated Azure will let you add the domain; press “Add custom domain”.
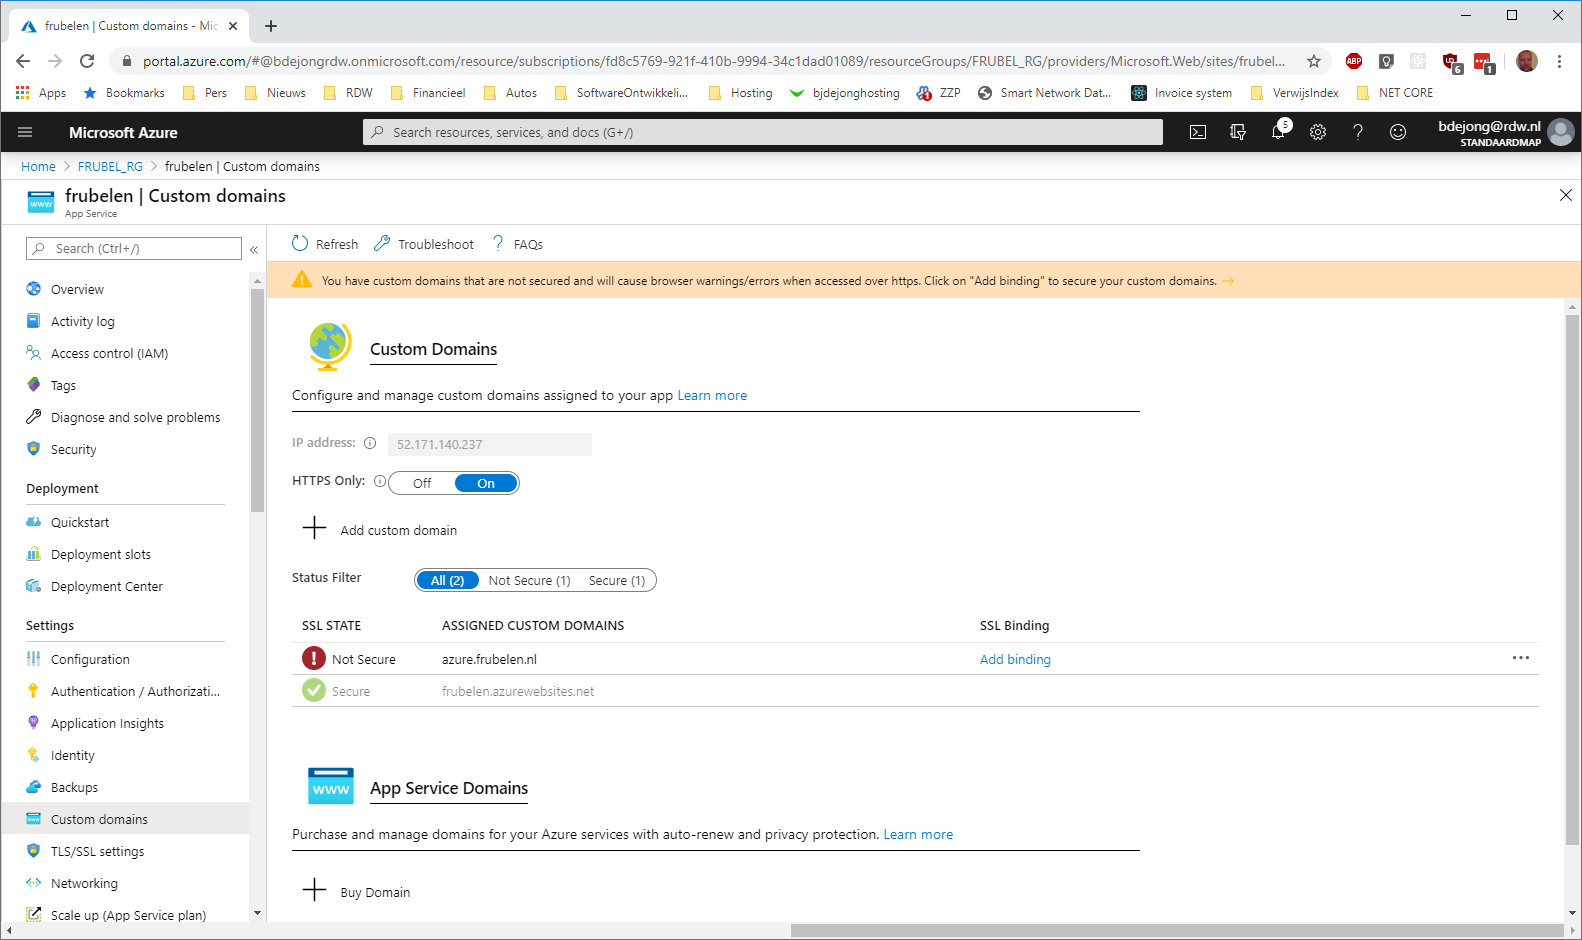
As you can see the domain is added. The next step is to secure our domain with a Let’s Encrypt certificate.
Enable Let’s Encrypt certificate
Now it is time to add the Let’s encrypt certificate to our domain. First of all you need a storage account. Let’s encrypt stores it certificate information on this storage account. Go to your resource group (mine is FRUBEL_RG) and press Add. Type “Storage account” and select the item from the dropdown. Press create. Type in a storage account name ( I will use letsencryptfrubelen). Press “Review and create” press “Create”.
Next navigate to the storage account just created and selected the keys “Access Keys” page.
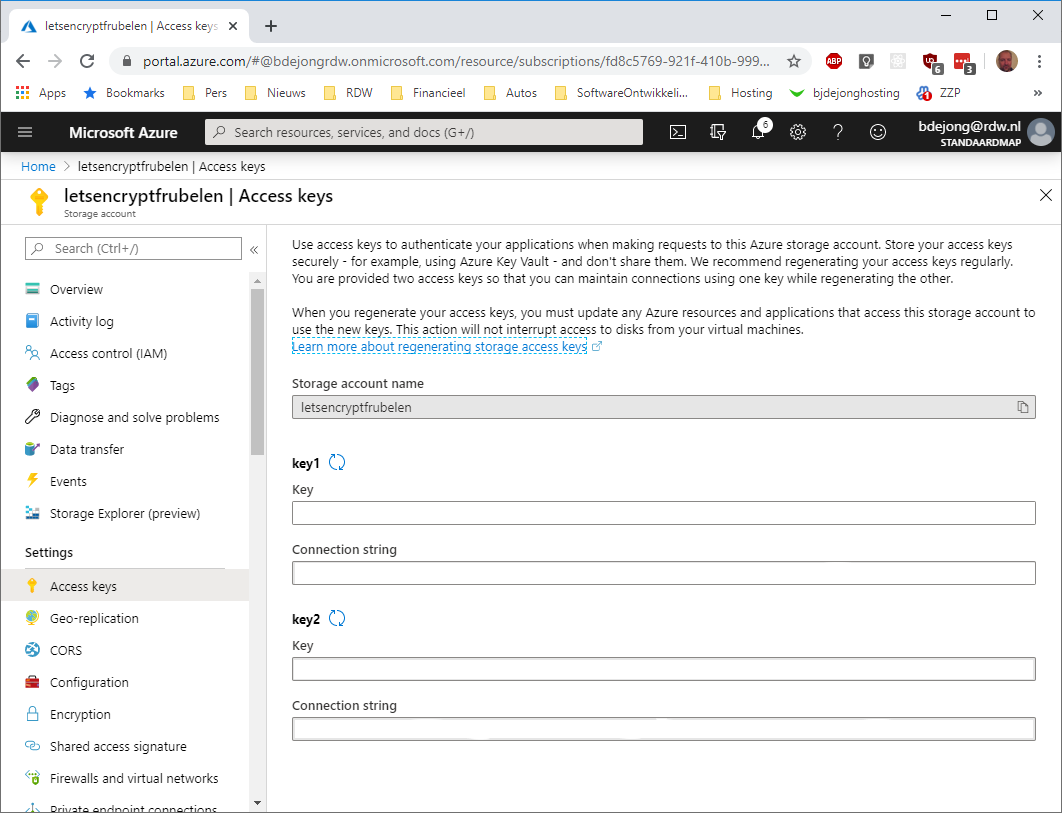
Copy the connectionstring for Key you will need this later on. Now in the Azure portal go back to your App Service and select Configuration on the left navigation.
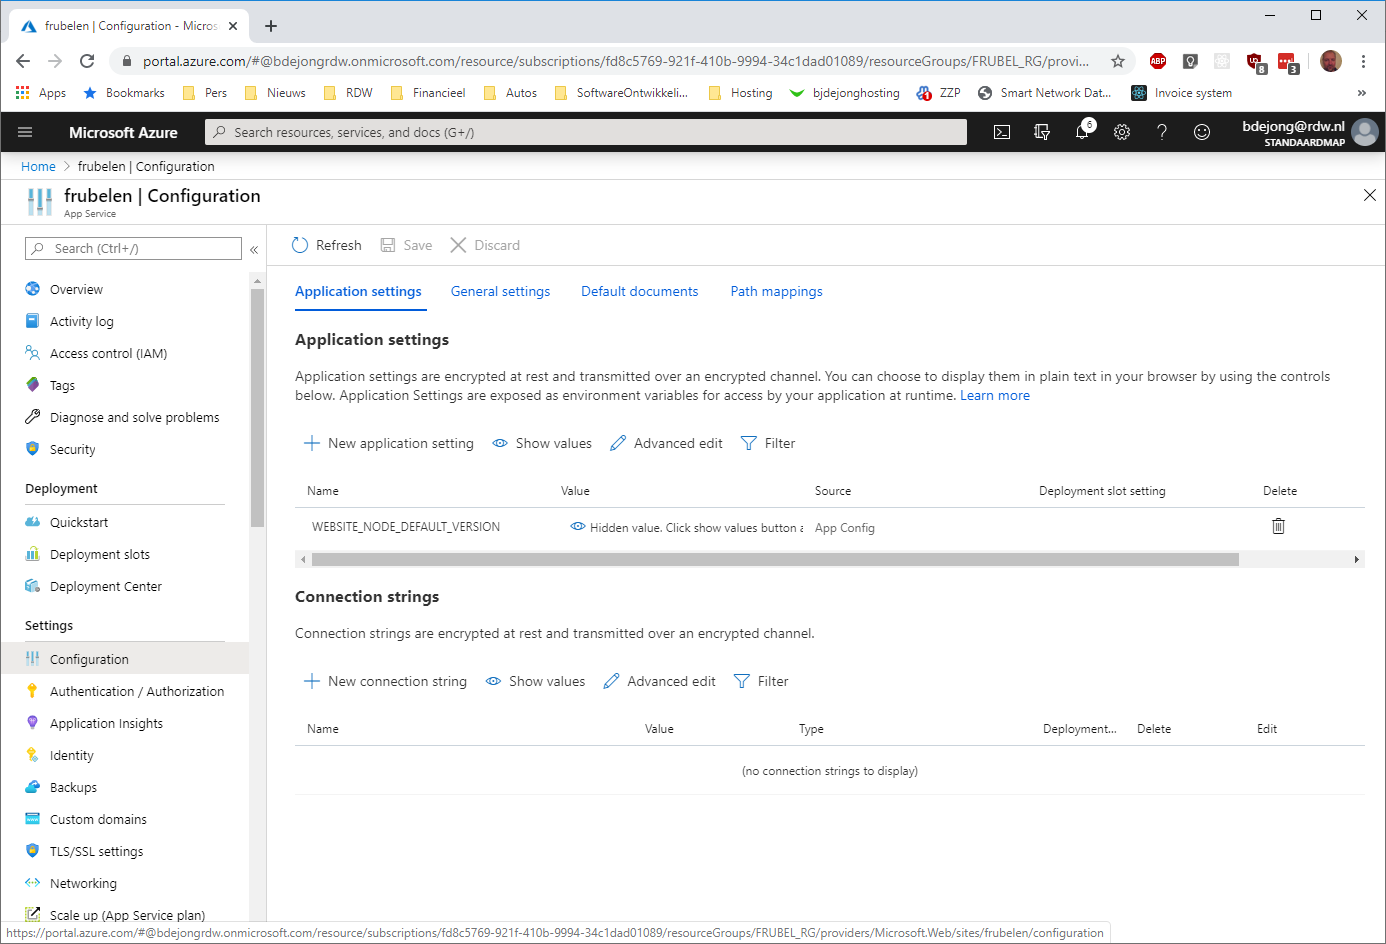
Now we are going to add 2 app settings to the app service. Both have as value the connection string to the storage account. Add the key AzureWebJobsStorage and AzureWebJobsDashboard.

First create a new App Registration. Select “Azure Active Directory”.

The select App Registration in the navigation on the left and then press “New Registration”.
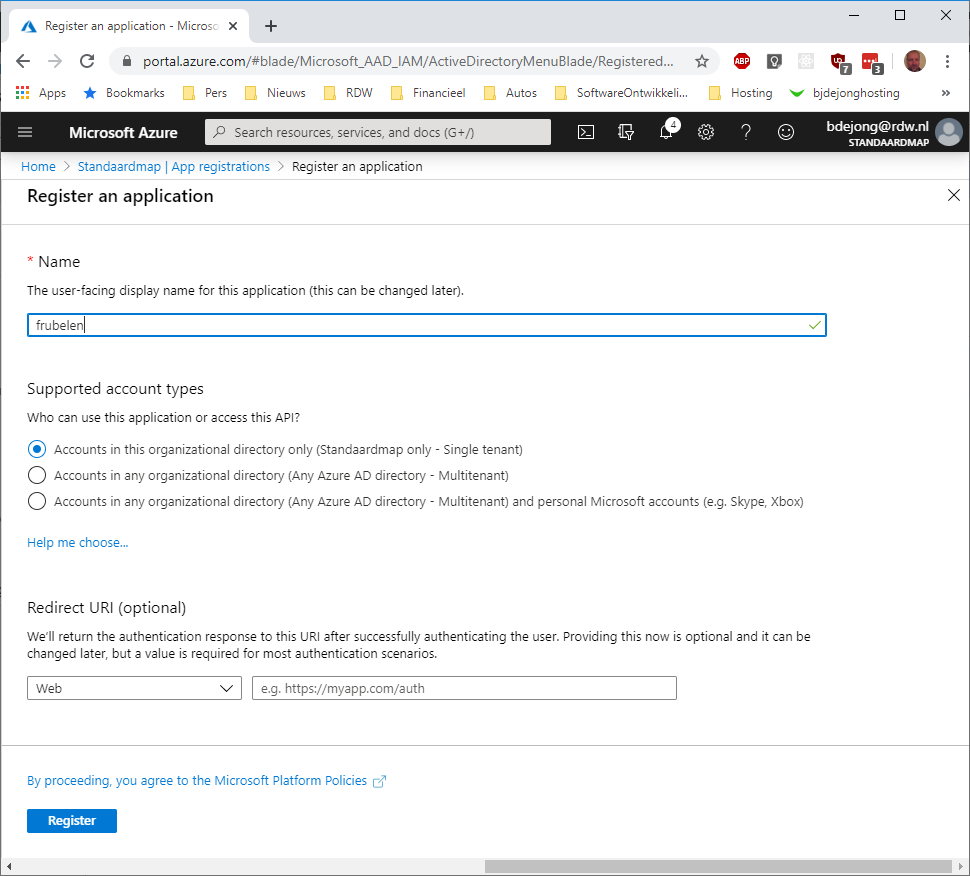
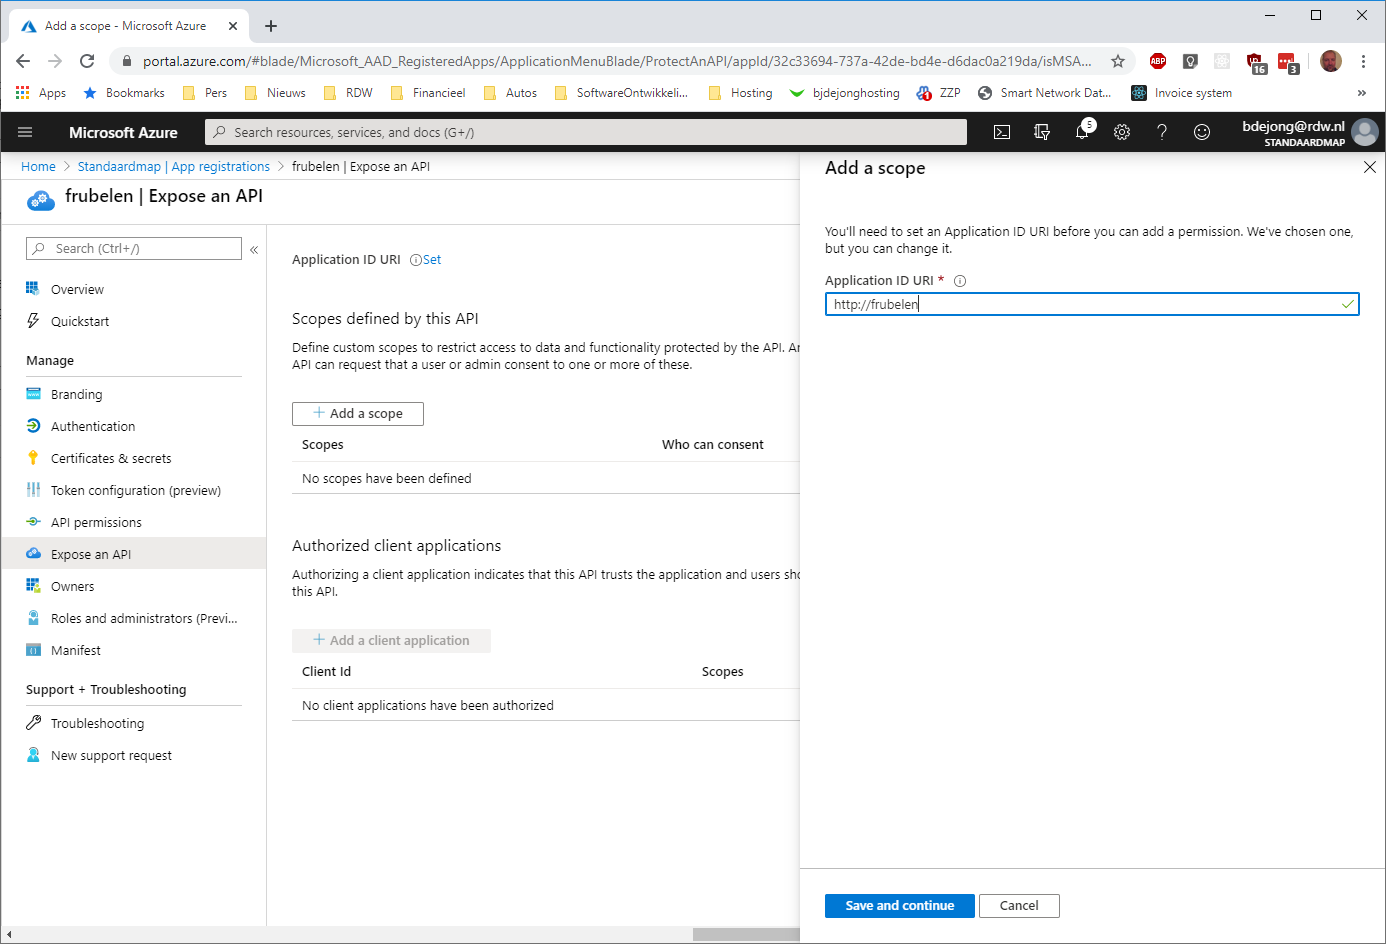
Press Register. On the overview screen press “Add an application ID URI”. Then press “Add a scope”. Remove the default and fill in (in my case) “http://frubelen” and press “Save and Continue”.
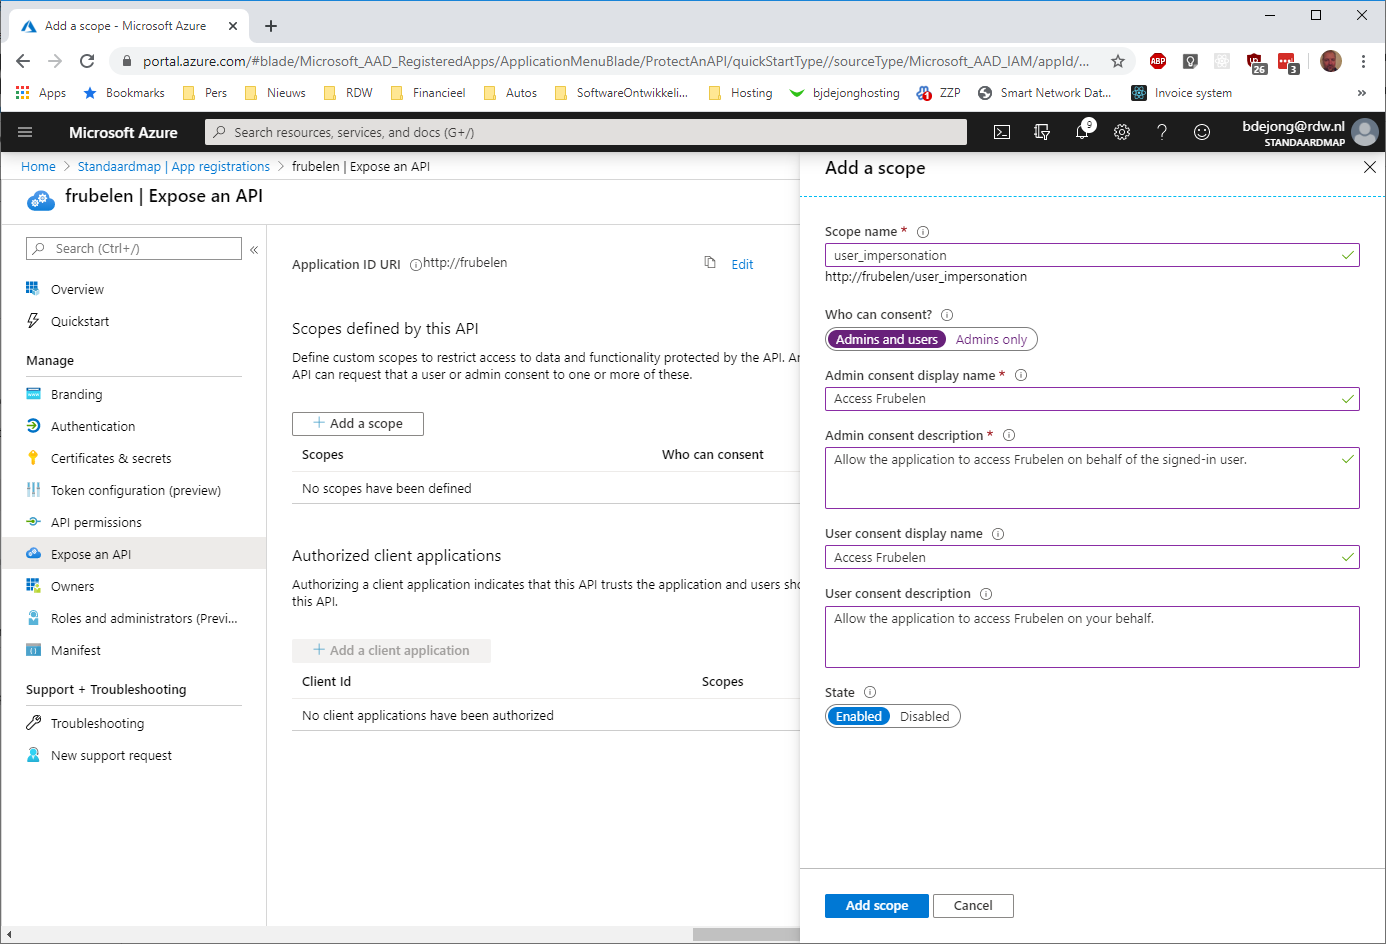
Fill out the next screen as shown below and press Add Scope.
First, you need to install the Azure PowerShell module, which can be done though WebPI or the PowerShell Gallery.
Execute the Powershell commands below. It will create an App Registration in your Azure Active directory.
$uri = 'http://frubelen'

$password = ConvertTo-SecureString "yourpassword" -asplaintext -force

$app = New-AzureRmADApplication -DisplayName {some display name} -HomePage $uri -IdentifierUris $uri -Password $password

New-AzureRmADServicePrincipal -ApplicationId $app.ApplicationId

New-AzureRmRoleAssignment -RoleDefinitionName Contributor -ServicePrincipalName $app.ApplicationId
As you can see the site has a domain name of “frubelen.azurewebsites.net”. Now it is time to assign our custom domain name to this site. After doing this we can send our browser to azure.frubelen.nl (for example) instead of the azure domain.
Assign a custom domain
Now we are going to assing our custom domain name. First of all you will have to decide if you want to assign the domain to the azure website or a subdomain.
If you want to assign the entire domain (not a subdomain) to this azure site you will have to create an A record at your dns provider. If you only want this azure site for a subdomain you should create a alias record, a CNAME record.
I have choosen to only send the subdomain azure.frubelen.nl to this site so I create a CNAME record at my DNS provider:
After changing your DNS registration it takes some time before all DNS servers have received this change. To check if DNS servers have received the change you could send your browser to https://digwebinterface.com/
Now go back to the azure portal and navigate to your App Service and select Custom Domains.
Press on “Add custom domain”. Fill in your subdomain to redirect to azure. In my example it is “azure.frubelen.nl”. Press Validate to let Azure retrieve the DNS records for the domain.
If the DNS servers are updated Azure will let you add the domain; press “Add custom domain”.
As you can see the domain is added. The next step is to secure our domain with a Let’s Encrypt certificate.
Enable Let’s Encrypt certificate
Now it is time to add the Let’s encrypt certificate to our domain. First of all you need a storage account. Let’s encrypt stores it certificate information on this storage account. Go to your resource group (mine is FRUBEL_RG) and press Add. Type “Storage account” and select the item from the dropdown. Press create. Type in a storage account name ( I will use letsencryptfrubelen). Press “Review and create” press “Create”.
Next navigate to the storage account just created and selected the keys “Access Keys” page.
Copy the connectionstring for Key you will need this later on. Now in the Azure portal go back to your App Service and select Configuration on the left navigation.
Now we are going to add 2 app settings to the app service. Both have as value the connection string to the storage account. Add the key AzureWebJobsStorage and AzureWebJobsDashboard.
First, you need to install the Azure PowerShell module, which can be done though WebPI or the PowerShell Gallery.
Execute the Powershell commands below. It will create an App Registration in your Azure Active directory.
$uri = 'http://frubelen'

$password = ConvertTo-SecureString "yourpassword" -asplaintext -force

$app = New-AzADApplication -DisplayName {some display name} -HomePage $uri -IdentifierUris $uri -Password $password

New-AzADServicePrincipal -ApplicationId $app.ApplicationId

New-AzRoleAssignment -RoleDefinitionName Contributor -ServicePrincipalName $app.ApplicationId
The commands above create an App Registration in the Azure Active Directory.
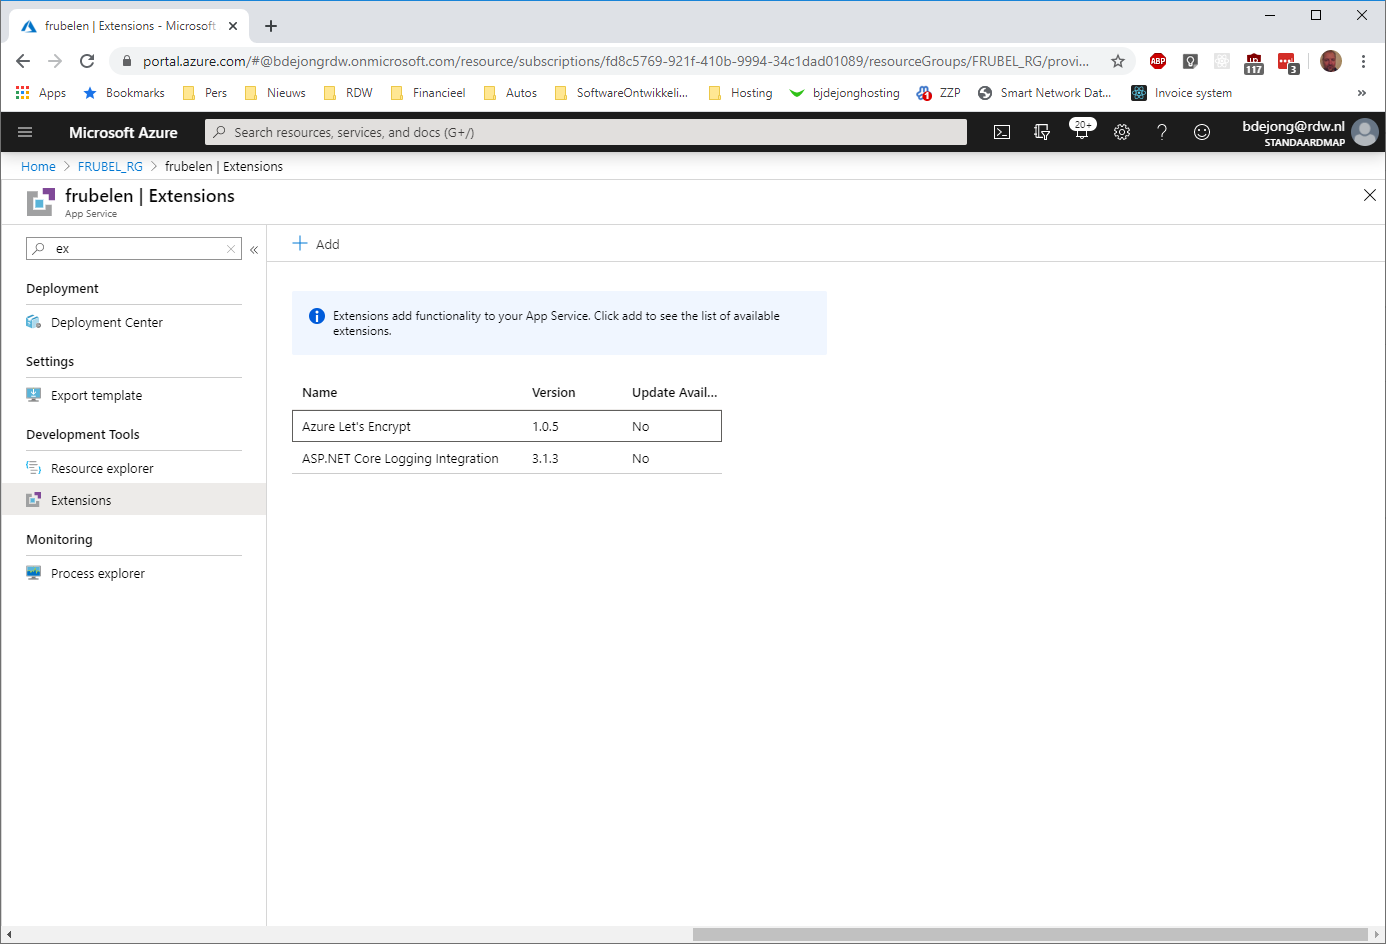
Next go to the App service and select Extensions in the left navigation. Add the Let’s encrypt extension. Press Add and search for “”
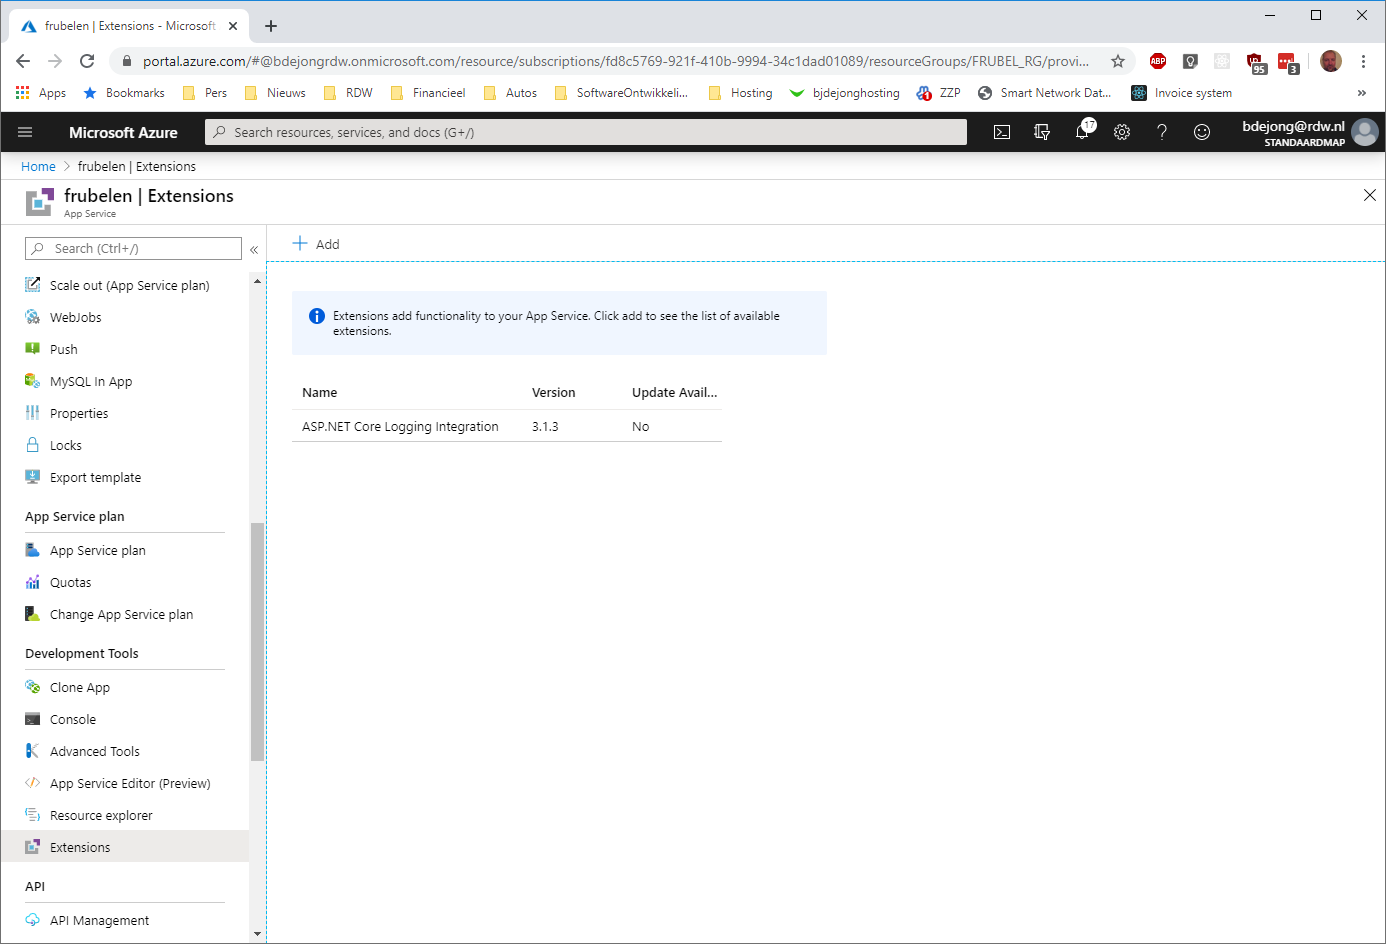
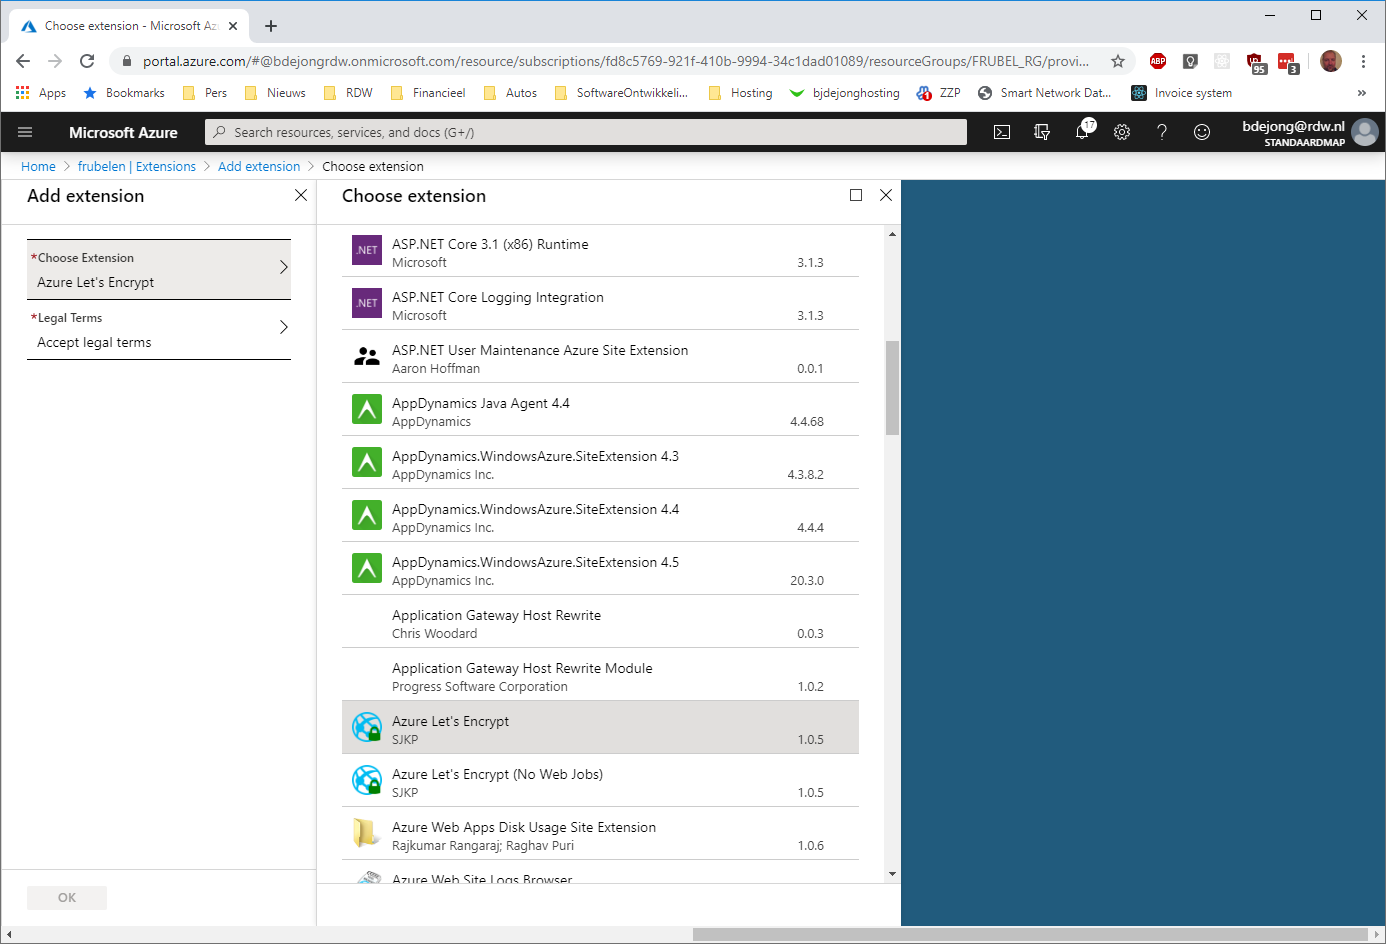
Select the Legal Terms item, press Ok and next press Ok to add the extension. Then select the Extension and press Browse. A new browser window will open in which you van configure Let’s encrypt.
Go to your App Service and select Configuration on the left navigation.
Add the following App Settings
letsencrypt:Tenant The name of the directory you are working inletsencrypt:SubscriptionId The id of your subscriptionletsencrypt:ResourceGroupName The name of the resource groupletsencrypt:ClientId This is the ApplicationId of the app service (in the powershell $app.ApplicationId)letsencrypt:ClientSecret The password (clear text)
Now go to the extensions page of the App Service and select Let’s Encrypt
In the screen that opens press Browse.
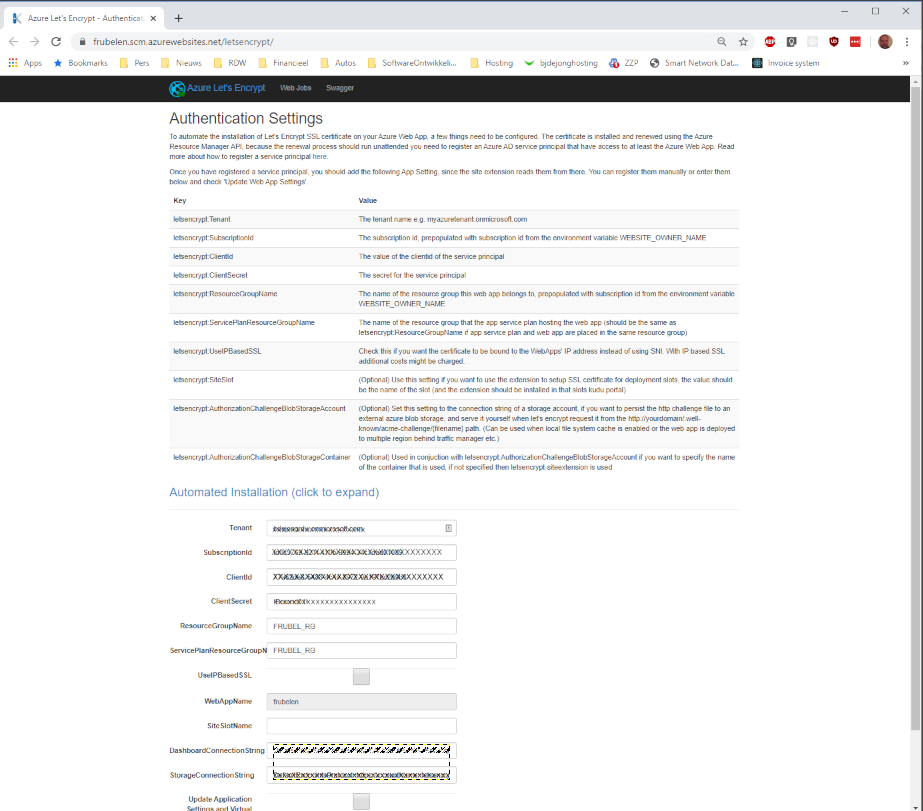
Fill in connection strings for the storage account and press Next.
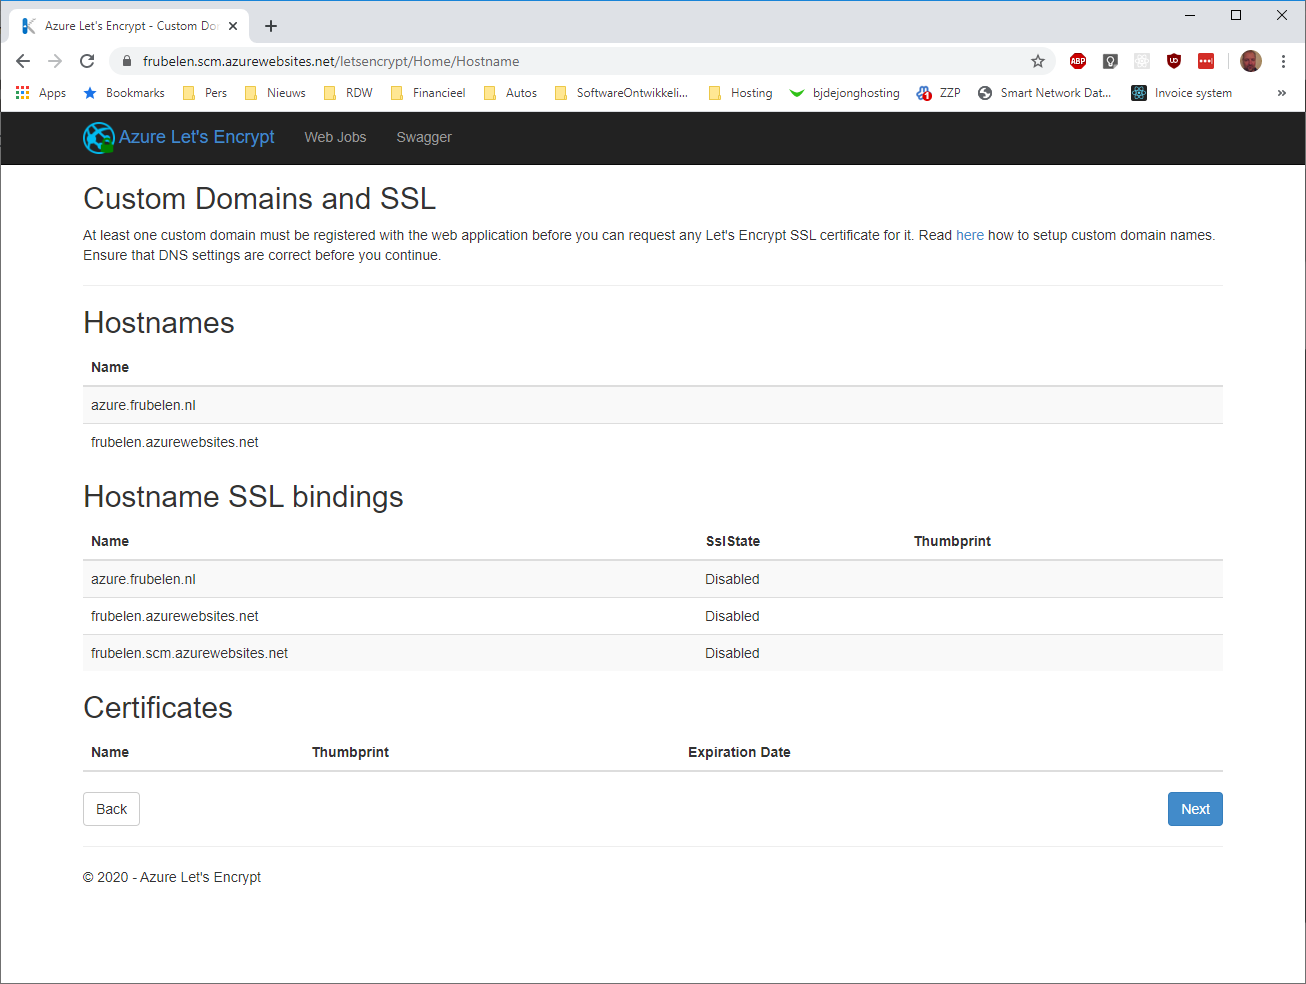
Press Next.
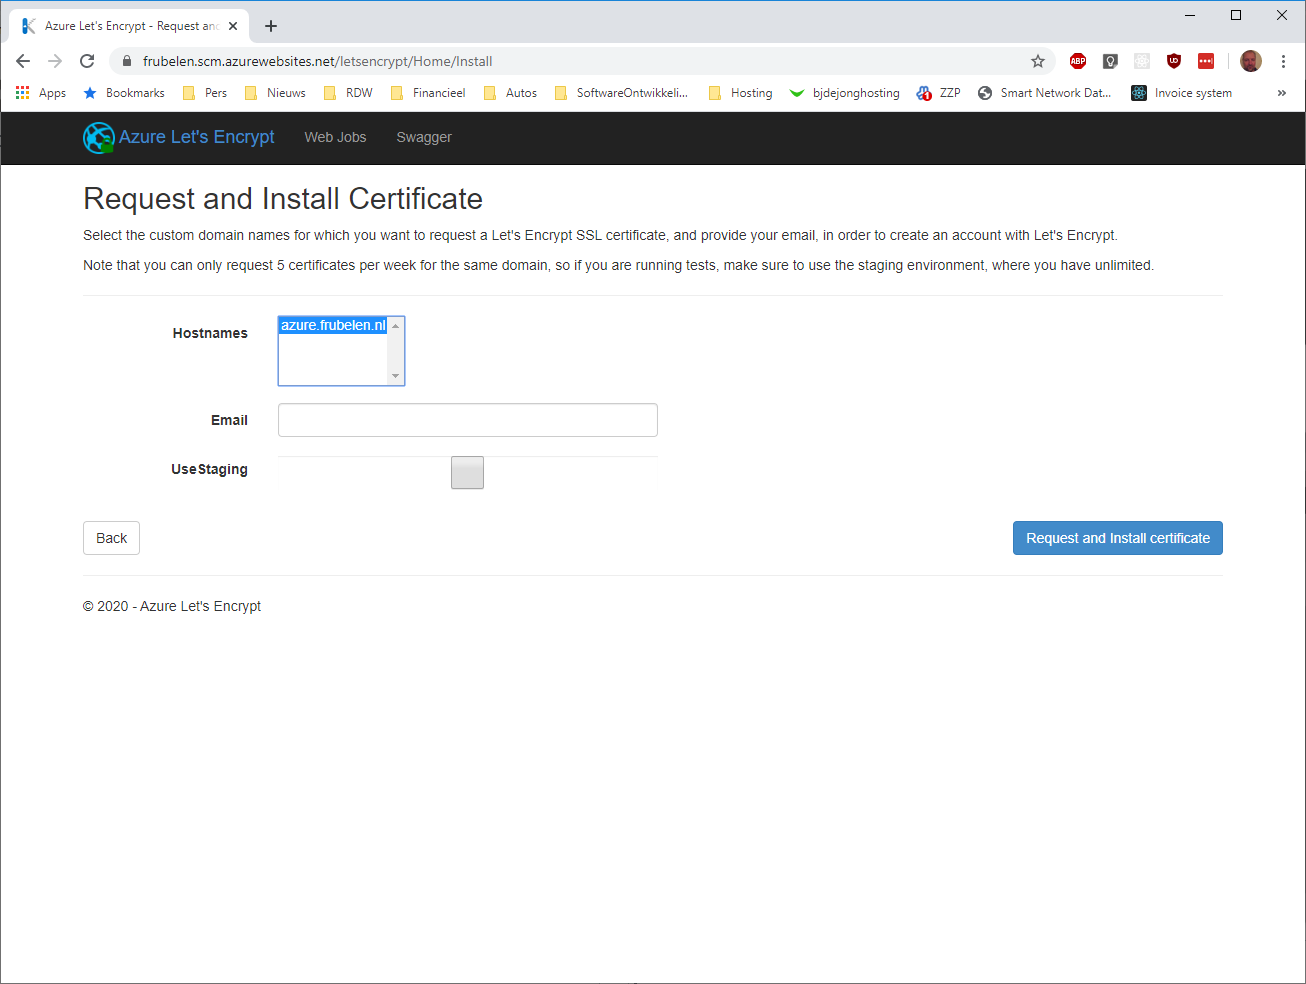
Select the domain you want a certificate for, fill in your email and press “Request and install certificate”.
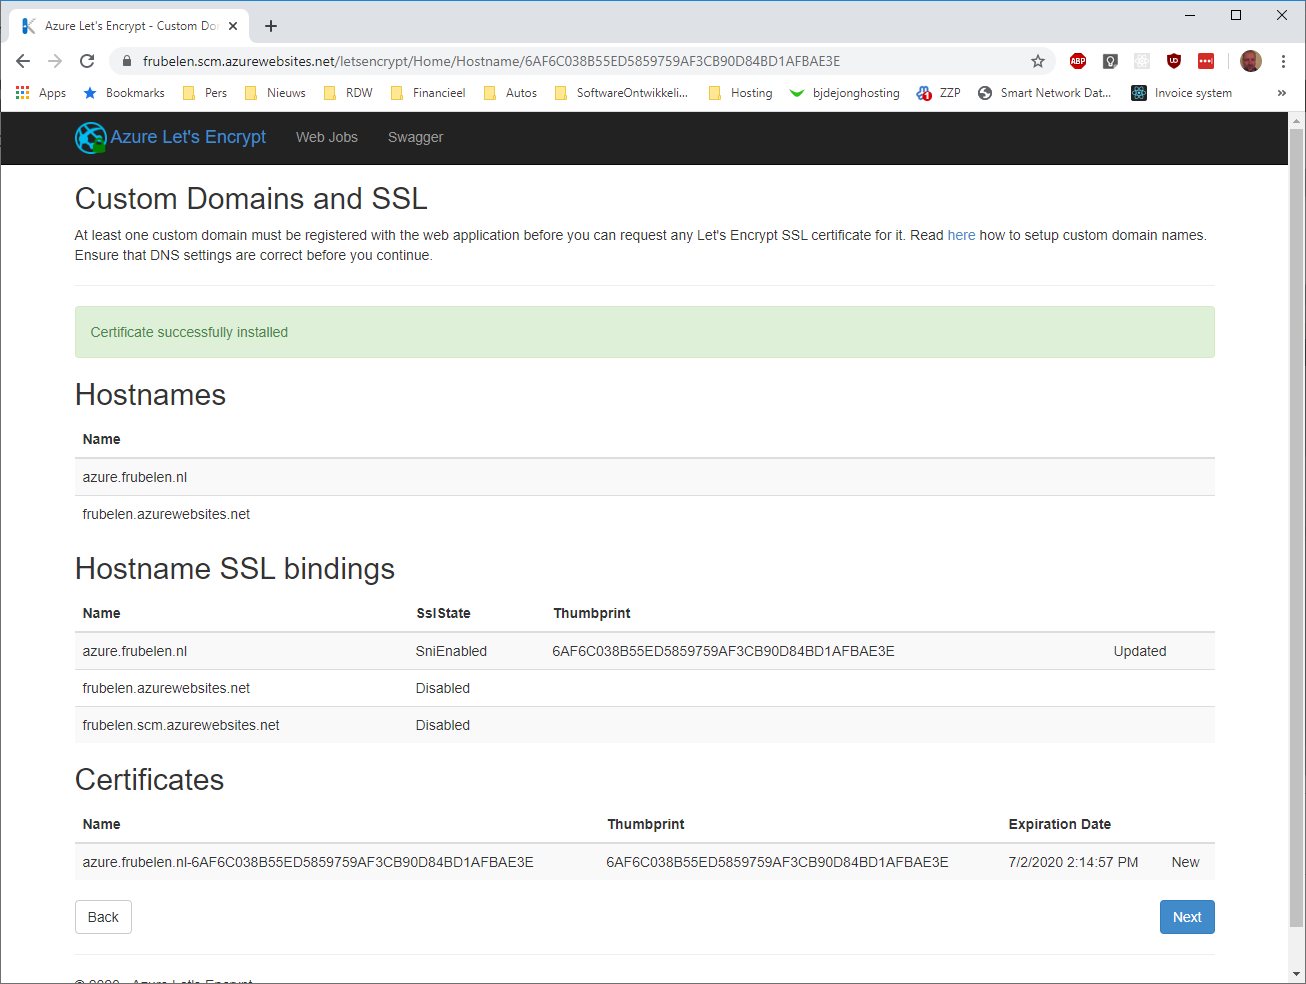
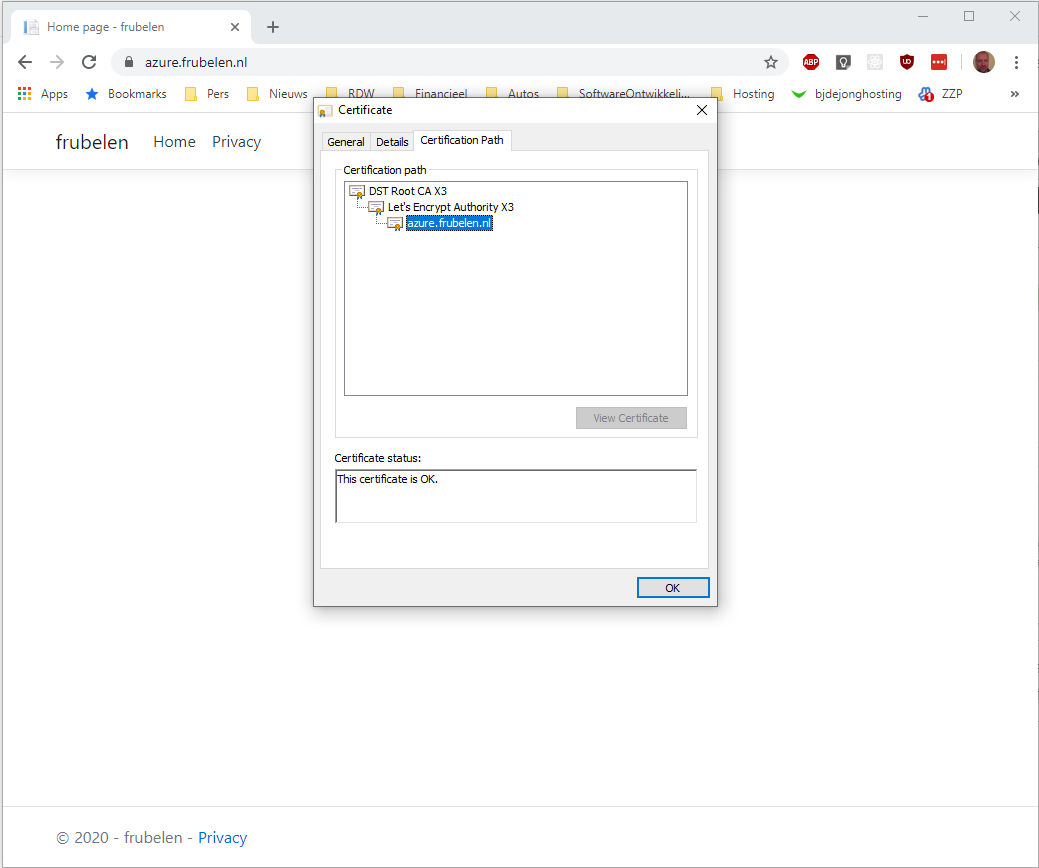
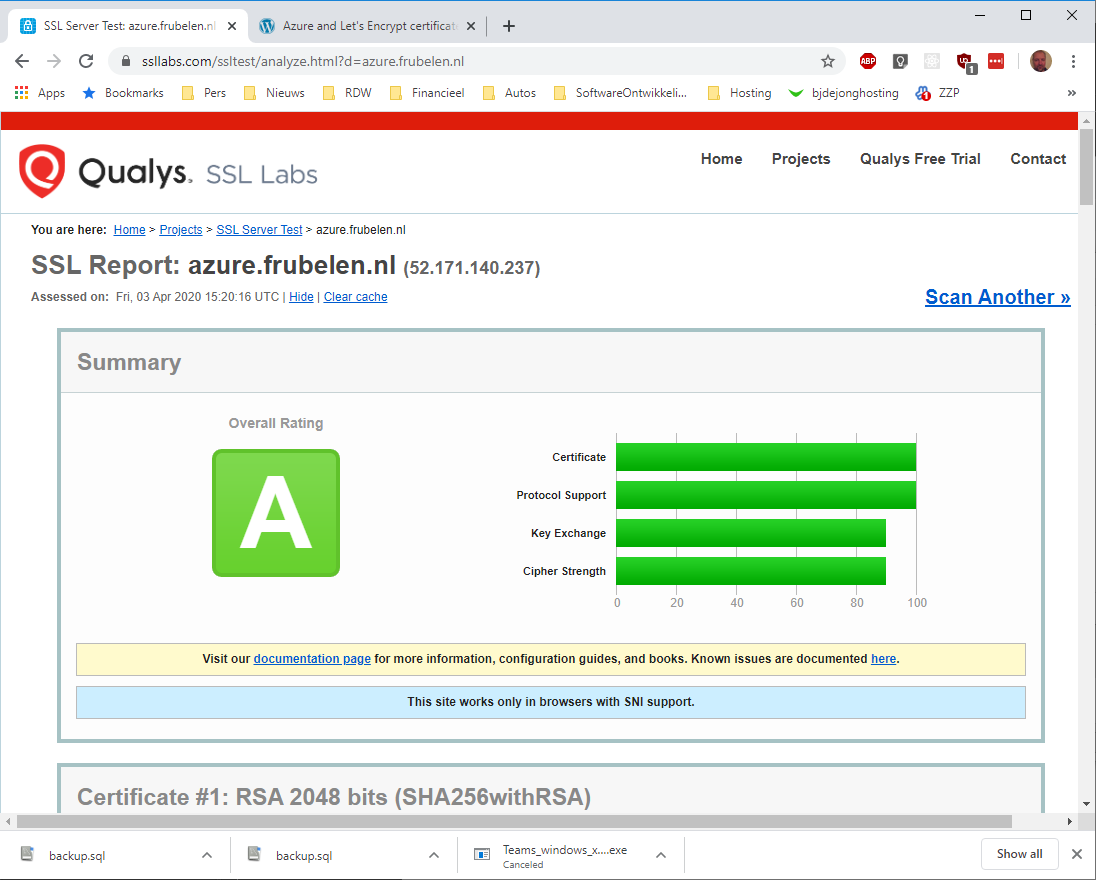
Your certificate is requested and installed. Now open a browser and navigate to https://azure.frubelen.nl. There you go your site is secured with a SSL certificate.