
With help of the Sequelize ORM you can manage your database models and queries. Below is an example of how to setup a many to many relationship with Nodejs and the Sequelize ORM. At the end of this article you can find a link to the source code.
First of all our scenario:
We have Invoices and Products in our database. As you can imagine you can receive a invoice for multiple products. Also a product can occur on multiple invoices. The relation between Invoices and Products is many to many.
1 Invoice can have 1 or more products and 1 product can have one or more invoices.

The way to model this in a database is with a so called join table. This table has a pointer to an Invoice and a pointer to a Product. Lets say we want to send two invoices.
Invoice number 2019001 with a SSD and a Laptop on it and Invoice number 2019002 with a harddisk and monitor on it. We have not yet sold any Desktop’s.
Our Invoice and Product tables look like this:
INVOICE                  PRODUCTS
ID   NR                  ID  DESC
1    2019001             1   Laptop
2    2019002             2   SSD
                         3   Harddisk
                         4   Monitor
                         5   Desktop
Then we have our join table, I have called it ProductInvoices after sending the invoices to our customer it will have the contents as shown below
INVOICEPRODUCT
INVOICE_ID PRODUCT_ID
1          1
1          2
1          3
2          3
2          4
Ok, now lets switch over to Nodejs and Sequelize. How are we going to model this in Sequelize? Below are all the steps to create a working program.
Create a new directory and setup your node environment, also initialize a new Sequelize setup with the Sequelize init command (you need to install the sequelize-cli package for this to work).
mkdir m_to_m
cd m_to_m
npm init -y
npm install sequelize-cli sequelize sqlite3
./node_modules/.bin/sequelize init
After this you will have the following directory structure (I use Visual Code for my development work as you can see).
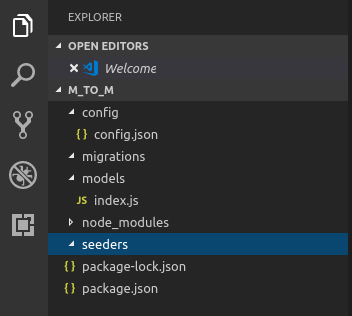
Now we are going to create the Invoice model. Start up visual code in the m_to_m directory (execute code . in this directory). Right click on the models folder and choose new file. Name it invoice.js. Place the code shown below in it.
module.exports = (sequelize, DataTypes) => {

	var Invoice = sequelize.define('Invoices', {
		nr : {
			type : DataTypes.INTEGER,
			allowNull : false,
			unique : {msg : 'Invoice nr should be unique'}
		}
	});

	Invoice.associate = (models) => {
    		Invoice.belongsToMany(models.Products, {
			through: 'ProductInvoices',
			as: 'Products',
			foreignKey: 'invoiceId'
		});
	};

	return Invoice;
}
Next create a file product.js also in the models folder with the following content:
module.exports = (sequelize, DataTypes) => {

	var Product = sequelize.define('Products', {

		name : {
			type : DataTypes.STRING,
            allowNull : false,
			unique : {msg : 'Product name should be unique'}
		}

	});

	Product.associate = (models) => {
			Product.belongsToMany(models.Invoices, {
			through: 'ProductInvoices',
			as: 'Invoices',
			foreignKey: 'productId'
		});
	};

	return Product;
}
The next model is optional. When you do not specify it Sequelize will generate one for you. Specifying it yourself has the advantage that you can also query this model if needed and add some attributes to the relation. For this example I have added a ‘remark’ attribute to this join table. We can add a remark to the product for this invoice.
So for now lets code it, but remember, it is optional if there is no need to query the join table or you do not have any relation attributes.
module.exports = (sequelize, DataTypes) => {

	var ProductInvoices = sequelize.define('ProductInvoices', {

		id : {
			type : DataTypes.INTEGER,
			primaryKey : true,
			autoIncrement: true,
		},

		productId : {
			type : DataTypes.INTEGER,
			unique : false,
            allowNull : false,
		},

		invoiceId : {
			type : DataTypes.INTEGER,
			unique : false,
            allowNull : false,
		},

		remark : {
			type : DataTypes.STRING,
			unique : false,
            allowNull : true,
		},
	});

	ProductInvoices.associate = (models) => {

		ProductInvoices.belongsTo(models.Products, {
			as: 'Product',
			foreignKey: 'productId'
		});
		ProductInvoices.belongsTo(models.Invoices, {
			as: 'Invoice',
			foreignKey: 'invoiceId'
		});
	};

	return ProductInvoices;
}
Now our model is complete and we can start to program against it. I love the Sequelize ORM, don’t you, no?, you will in a minute…..
We have to do some configuration for the database connection before we are able to create the database. In this example I will be using a SQLite database. Remove the file generate by Sequelize at ~/m_to_m/config/config.json. Create a new file at this location but with the extension js. Place the contens shown below in this config.js file
module.exports = {
  "development": {
    "dialect": "sqlite",
    "storage" : "./database_dev.sqlite3",
    "operatorsAliases": false,
  },
  "test": {
    "dialect": "sqlite",
    "storage" : "./database_tst.sqlite3",
    "operatorsAliases": false
  },
  "production": {
    "dialect": "sqlite",
    "storage" : "./database_prd.sqlite3",
    "operatorsAliases": false
  }
}
There is one last thing to do before our database setup is complete. Edit the generated index.js file at ~/m_to_m/models and change config.json to config.js (remove the “on” at the end of the filename extension).
const config = require(__dirname + '/../config/config.js')[env];Now the database setup is complete, lets start to write some code. Create a new file in the root of your project and name it app.js, place the code shown below in it.
var models = require('./models');
models.sequelize.sync().then(() => {
   console.log(`DB ${db.options.storage} created.`);
});
When you execute this node program the database database_dev.sqlite3 will be created (see the config.js file in the config directory). The SQL that is executed against the SQLite driver is also shown:
~/m_to_m$: node app.jsExecuting (default): CREATE TABLE IF NOT EXISTS
`Invoices` (`id` INTEGER PRIMARY KEY AUTOINCREMENT, `nr` INTEGER NOT NULL, `createdAt` DATETIME NOT NULL, `updatedAt` DATETIME NOT NULL);
Executing (default): PRAGMA INDEX_LIST(`Invoices`)
Executing (default): PRAGMA INDEX_INFO(`sqlite_autoindex_Invoices_1`)
Executing (default): CREATE TABLE IF NOT EXISTS
`Products` (`id` INTEGER PRIMARY KEY AUTOINCREMENT, `name` VARCHAR(255) NOT NULL, `createdAt` DATETIME NOT NULL, `updatedAt` DATETIME NOT NULL);
Executing (default): PRAGMA INDEX_LIST(`Products`)
Executing (default): PRAGMA INDEX_INFO(`sqlite_autoindex_Products_1`)
Executing (default): CREATE TABLE IF NOT EXISTS `ProductInvoices` (`id` INTEGER PRIMARY KEY AUTOINCREMENT, `productId` INTEGER NOT NULL REFERENCES `Products` (`id`) ON DELETE CASCADE ON UPDATE CASCADE, `invoiceId` INTEGER NOT NULL REFERENCES `Invoices` (`id`) ON DELETE CASCADE ON UPDATE CASCADE, `remark` VARCHAR(255), `createdAt` DATETIME NOT NULL, `updatedAt` DATETIME NOT NULL, UNIQUE (`productId`, `invoiceId`));
Executing (default): PRAGMA INDEX_LIST(`ProductInvoices`)
Executing (default): PRAGMA INDEX_INFO(`sqlite_autoindex_ProductInvoices_1`)~/m_to_m$:DB CreatedTo inspect the contents of this database you can for example use “DB Browser for SQLite” or DBeaver . Install “DB Browser for SQLite” with
sudo apt install sqlitebrowser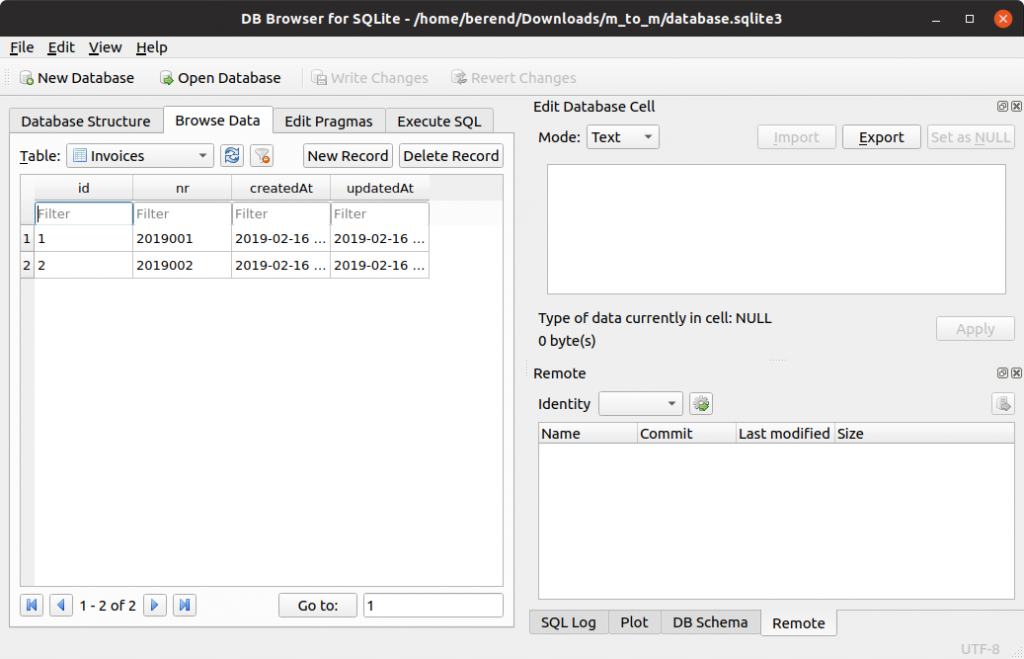
Now we are going to add some records to our database and query the database. We will be adding five products and two invoices as described above. After that we will generate an overview of the data in the database.
Here is the code to store and query our Invoices and products.
var models = require('./models');

(async () => {

    let db = await models.sequelize.sync();

    console.log(`DB ${db.options.storage} created.`);

    await models.Invoices.destroy({ where : {}, truncate : true});
    await models.Products.destroy({ where : {}, truncate : true});

    let laptop = await models.Products.create( { name : 'Laptop' })
    let ssd = await models.Products.create( { name : 'SSD' });
    let harddisk = await models.Products.create( { name : 'Harddisk' });
    let monitor = await models.Products.create( { name : 'Monitor' });
    let desktop = await models.Products.create( { name : 'Desktop' });

    invoice = await models.Invoices.create({ nr : 2019001 });
    await invoice.addProducts([ssd],  {through: { remark: '10% discount on SSD' }});
    await invoice.addProducts([harddisk, laptop]);

    invoice = await models.Invoices.create({ nr : 2019002 });
    await invoice.addProducts([harddisk, monitor]);

    invoices = await models.Invoices.findAll(
        {
            include : [ {model: models.Products, through: 'ProductInvoices', as: 'Products'}]
        }
    );

    invoices.forEach(invoice => {

        console.log(`INVOICE: ${invoice.id} ${invoice.nr}`);
        invoice.Products.forEach(product => {
            console.log(`\tPRODUCT: ${product.id} ${product.name}`);
        })
        console.log();

    });

    products = await models.Products.findAll(
        {
            include : [ {model: models.Invoices, through: 'ProductInvoices', as: 'Invoices'}]
        }
    );

    products.forEach(product => {

        console.log(`PRODUCT ${product.id} ${product.name}`);
        product.Invoices.forEach(invoice => {
            console.log(`\tINVOICE: ${invoice.id} ${invoice.nr}`);
        })
        console.log();

    });

    /*
     * Weird but possible adding records via jointable.....
     */
    pi = await models.ProductInvoices.create(
    {
        invoiceId : (await models.Invoices.create({ nr : 2019009})).id,
        productId : (await models.Products.findOne({ where : { name : 'Desktop' } })).id
    });

    productInvoices = await models.ProductInvoices.findAll(
        {
            include : [
                {model: models.Products, as : 'Product'},
                {model: models.Invoices, as : 'Invoice'}
            ]
        }
    );

    productInvoices.forEach(pi => {
        console.log(`${pi.id} ${pi.Invoice.id} ${pi.Invoice.nr} ${pi.Product.id} ${pi.Product.name}`);
    });
})();
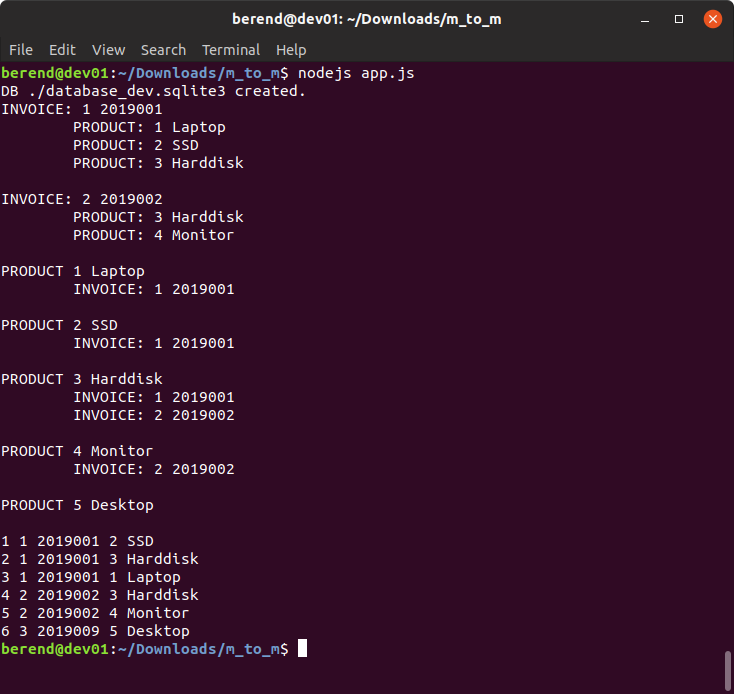
After running this code you will have two Invoices and five Products in your database. The image below shows the console output of running this Nodejs program. I have switched of Sequelize logging (add an attribute “logging” : false to the appropriate entry in ~/config/config.json) so the output is a bit more readable.
You can find the complete working example here and a typescript variant can be found here.
Got to elaborate on this, see https://www.npmjs.com/package/sequelize-typescript
